
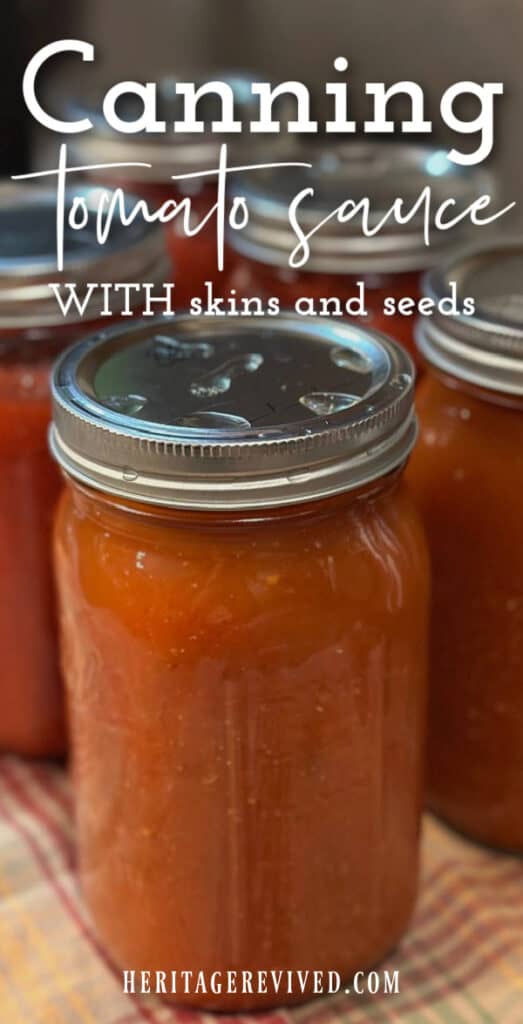
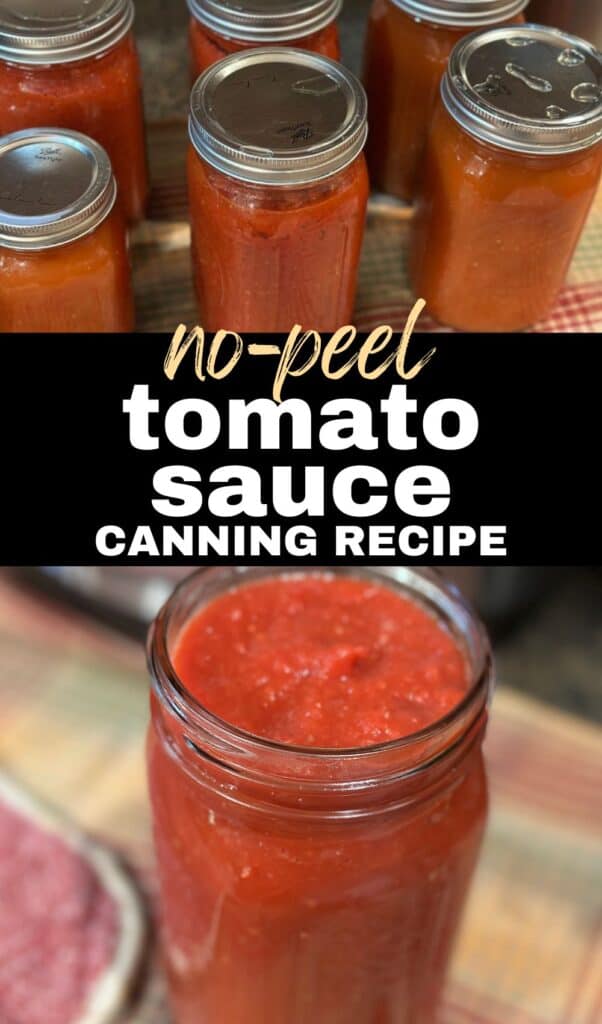
Canning Tomato Sauce (with skins and seeds): How-to Guide
A simple tutorial for canning tomato sauce with skins and seeds: It’s the time-saving shortcut you’ve been missing.
I don’t know about you, but by the end of the summer gardening season, canning can turn into a full time job.
As much as I LOVE my garden and the bounty it provides, it’s definitely work.
After processing vegetables for weeks on end, I’m ready for the winter break, quite frankly!
This year was an exceptional test of my canning endurance, because – despite a crazy drought – we had a bumper crop of tomatoes.
(Yes, a lot of watering was involved. And pruning. And watering. Did I mention watering?)
I found myself up late at night, glancing at my piles of tomatoes all over the kitchen counters, with no time left in the day to process them.
Fortunately, I learned a great trick last year for canning tomato sauce. I started quartering and freezing them in gallon bags (with skins and all).
As it turned out, those frozen tomatoes were just perfect for making tomato sauce with – when I did have time for canning.
Canning tomato sauce with skins and seeds: is it a good idea?
You’ve probably heard that you must remove the skins and seeds of your tomatoes to make a tasty tomato sauce.
This involves dipping tomatoes in boiling hot water for a few minutes, then an ice bath, then removing the skins. Lastly, coring and trying to remove as many seeds as possible.
Some people also run them through a food mill for an ultra-smooth sauce.
For my family- which includes two super-picky children – they have never even noticed the seeds or skins.
Once they are all blended together, I don’t even taste them, myself.
This site contains affiliate links to products. As an Amazon associate, I earn from qualifying purchases. Please read my disclosure for more info.
More Benefits of Using Tomato Skins and Seeds
And there are a few more reasons I like to save the skins and seeds – besides skipping the laborious step of removing them.
It’s always seemed wasteful to me to throw away so much of my tomatoes.
If you have a waste-not-want-not philosophy, you will like this method, too.
There are also nutritional benefits we miss out on when we discard tomato skins and seeds, including important antioxidants like lycopene.
West Virginia University Study
In fact, one recent study states implicitly: “The bulk of tomatoes nutrients and health benefits are within the skin and seed components.
The West Virginia University report went on to state that “..tomato skin and seeds have 3 times more lycopene compared to the pulp.“
They advocated for an “revised health-conscious protocol” to prevent nutrient loss.
This idea is what I’m demonstrating in this post.
While removing skins makes sense for salsa, and diced tomatoes and any other type of tomato that you want partially intact as the end product – it simply doesn’t matter for tomato sauce, I’ve found.
With some precautions.
All you really need is some time, and a good immersion blender.
No Peel Tomato Sauce Canning Instructions
Here’s how to make your home-grown tomatoes into an EASY canned tomato sauce with just a few simple steps.
I’ll outline a few different options you can use as well, depending on your preference.
I choose not to add any salt or spices before I can my sauce.
The flavor seems to come through better when I add them to the sauce in whatever dish I’m making, instead. It also makes it more versatile.
You can jump to the recipe card below if you’d like to skip these detailed instructions.
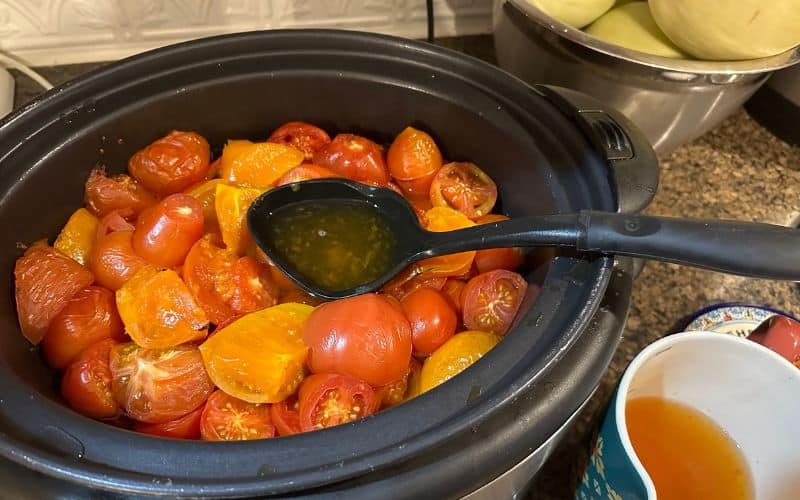
Quarter tomatoes, blanch and add to large slow cooker
First, you simply wash your tomatoes well and remove the stems. Let them partially thaw first, if frozen.
*The best practice would be to next blanch your whole, fresh tomatoes.
If you are picking tomatoes you know you’re going to freeze, blanch them before freezing.
While blanching, do not score them. Simply plunge them in boiling water for just a minute or so to kill any micro-organisms on the skins.
Then place in ice water to quickly cool the tomatoes and retain nutrients.
Next, quarter your tomatoes and add to a crockpot or stockpot.
I like to use my 8-quart crockpot along with my 8-quart InstaPot (on slow cooker setting) for a big batch.
A big electric turkey roaster also works great.
(Mine broke this year, sadly. Time to thrift a new one!)
Read next: How to Preserve Basil for Winter
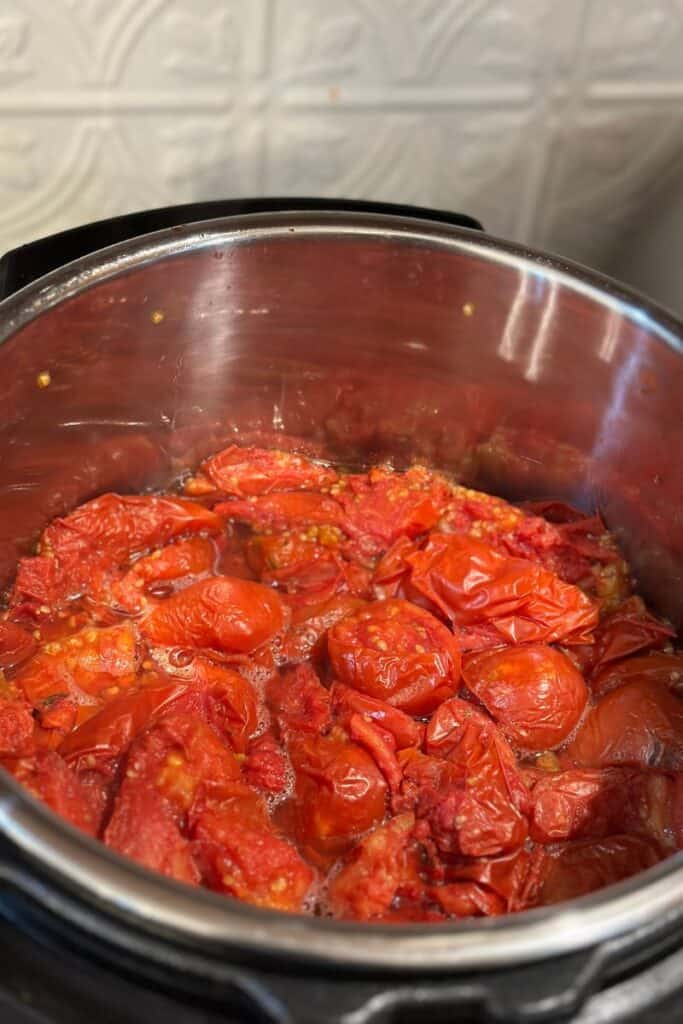
Cook tomatoes down to desired consistency
Cook your tomatoes on low heat for several hours- all day or all night – if using a slow cooker, stopping to drain off excess liquid that rises to the top as the tomatoes cook.
If your tomatoes were frozen before blanching, you may have more liquid to drain off.
If you’re making a large batch, you can continue adding more tomatoes or frozen tomatoes as the liquid is removed and you have more room in your slow cooker or pot(s).
I just use my ladle to scoop out the excess liquid.
*Note, you can save this juice that rises to the top and freeze in freezer bags for soups later on.
If you’re cooking your tomatoes in a pot on the stove top, be sure to keep the heat on the lowest setting and stir them / check them often.
They won’t take as long to cook down.
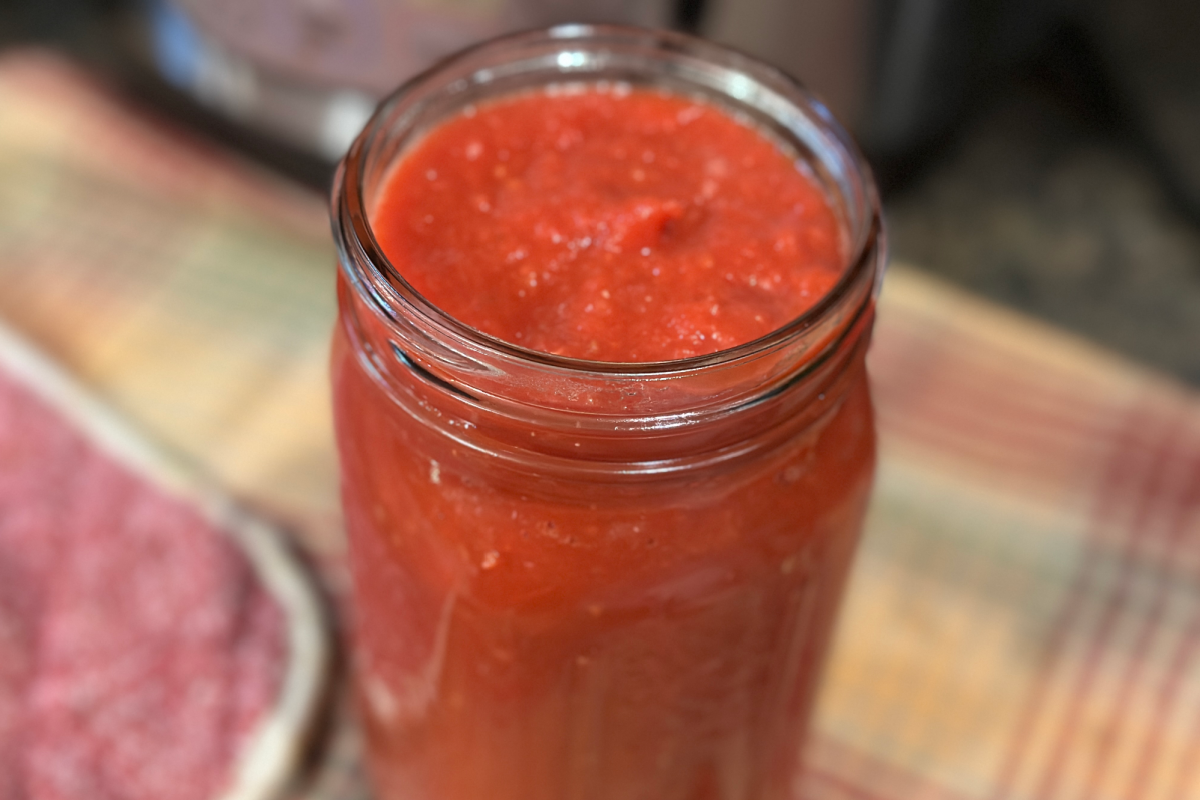
After your tomatoes have shrunk significantly and you’re not able to ladle much water off (after several hours), it’s time to puree them.
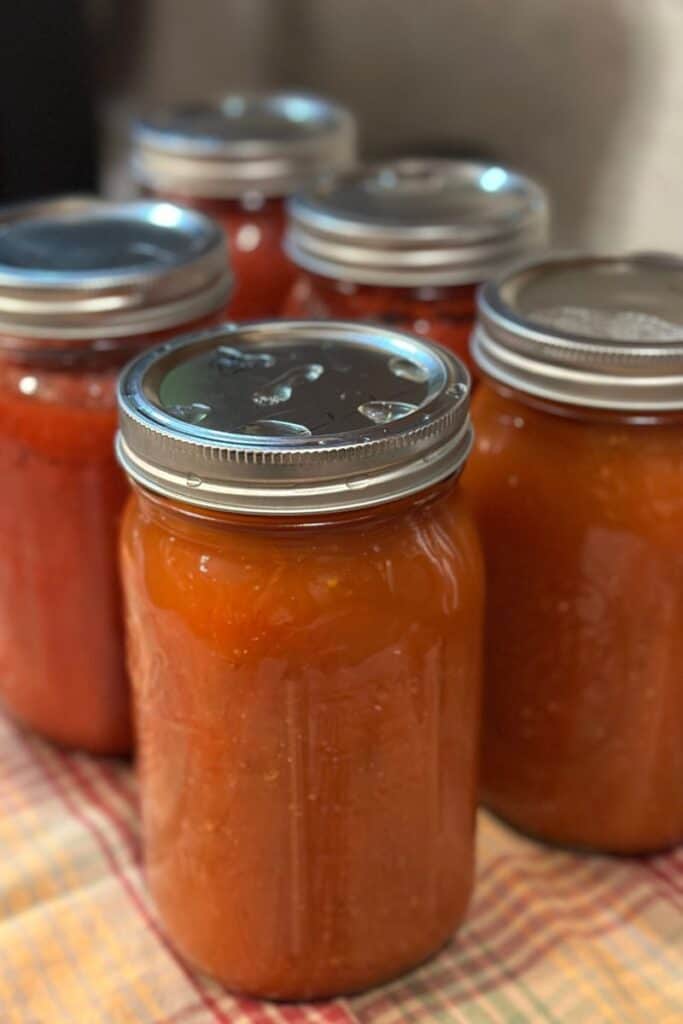
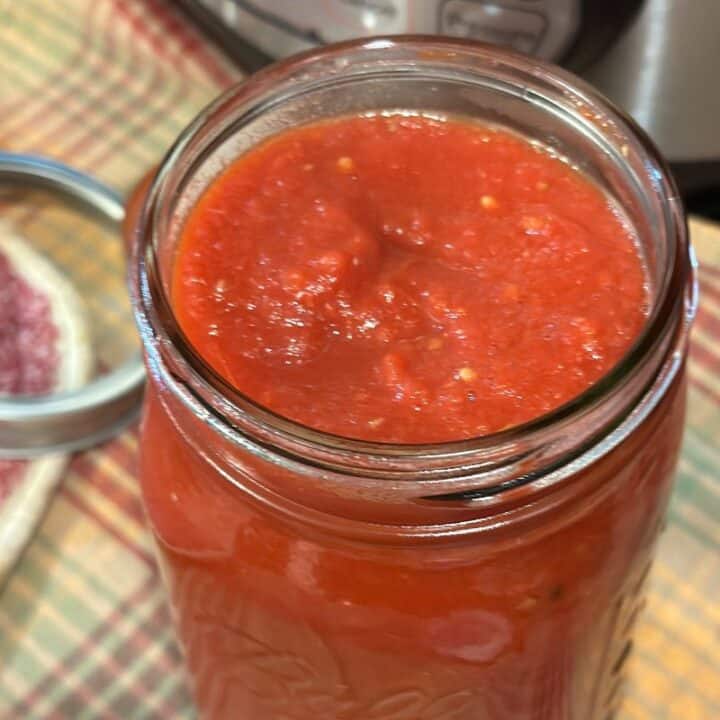
They will look something like the image below, if you like a thick sauce as I do.
For a thinner sauce, simply leave more of the liquid.
I find that the longer I cook the tomatoes, the more dissolved the skins become and they blend together more easily.
Blend with immersion blender
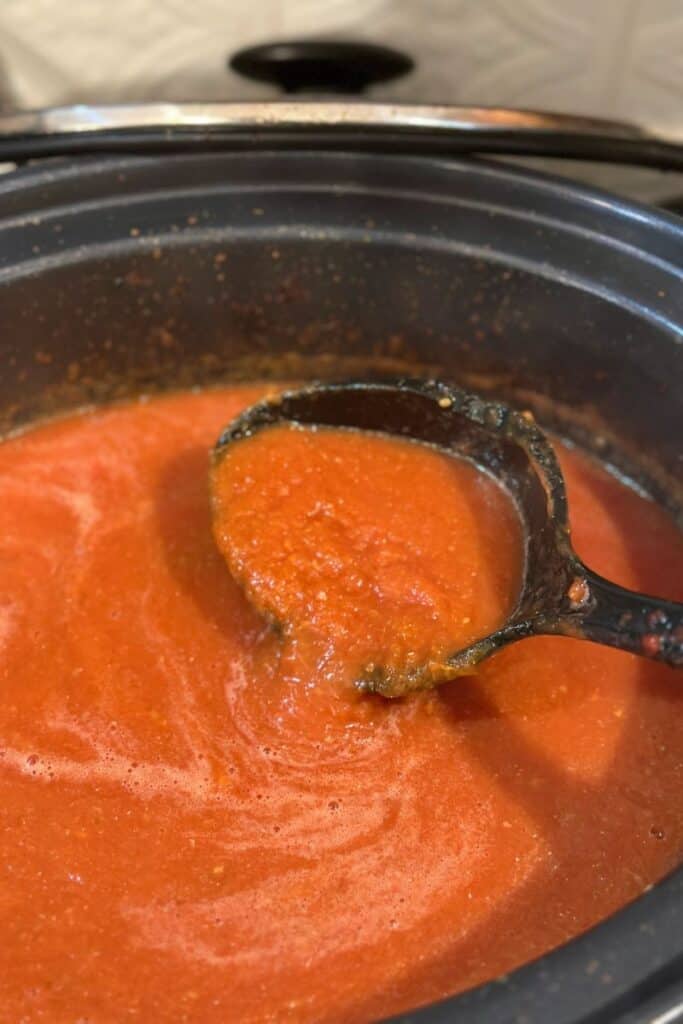
Next, you can use an immersion blender to blend until the sauce is smooth.
Note: turn off the cooker for a few minutes before blending, to keep the sauce from bubbling while blending (and avoid burns).
If you don’t have an immersion blender, you can use a regular blender.
However, you’ll need to let the tomatoes cool a while.
Next, blend, return to your slow cooker / stock pot and bring to a low heat again.
If your sauce looks too thin after you blend it, you can cook it a while longer.
In the slow cooker, I will usually adjust the lid so that steam can escape and the liquid can cook down some more.
Prepare canning jars
After blending and while your sauce is simmering again, start heating your sterilized jars with your preferred method.
I like to use my Presto Digital Pressure Canner to do 5 quarts + 1 pint per load.
I prefer to pressure can my sauce, but you can also water-bath it. See next steps for both methods.
Fill Jars
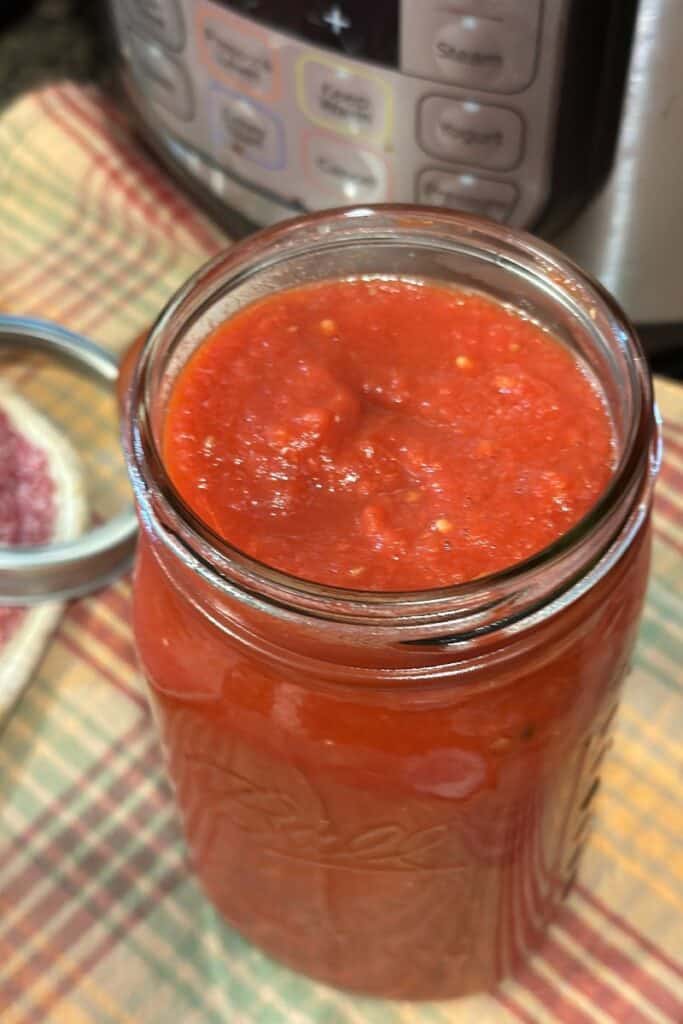
Next, fill your empty, hot and sterilized canning jars using a jar funnel, leaving 1/2 in. headspace.
Use a bubble wand to remove any bubbles.
Wipe rims with a damp cloth. Place lid on jar and tighten the ring finger-tight.
If pressure canning, you don’t need to add any acid, but it’s recommended for water bathing.
Tomatoes can vary greatly in acidity.
You can add 2 Tablespoons of bottled lemon juice per quart jar or 1 Tablespoons per pint jar, or 1/2 tsp of citric acid to quarts and 1/4 tsp for pints.
Pressure cook pints or quarts for 15 minutes. Or you can water bath quarts for 40 minutes, pints for 35 minutes.
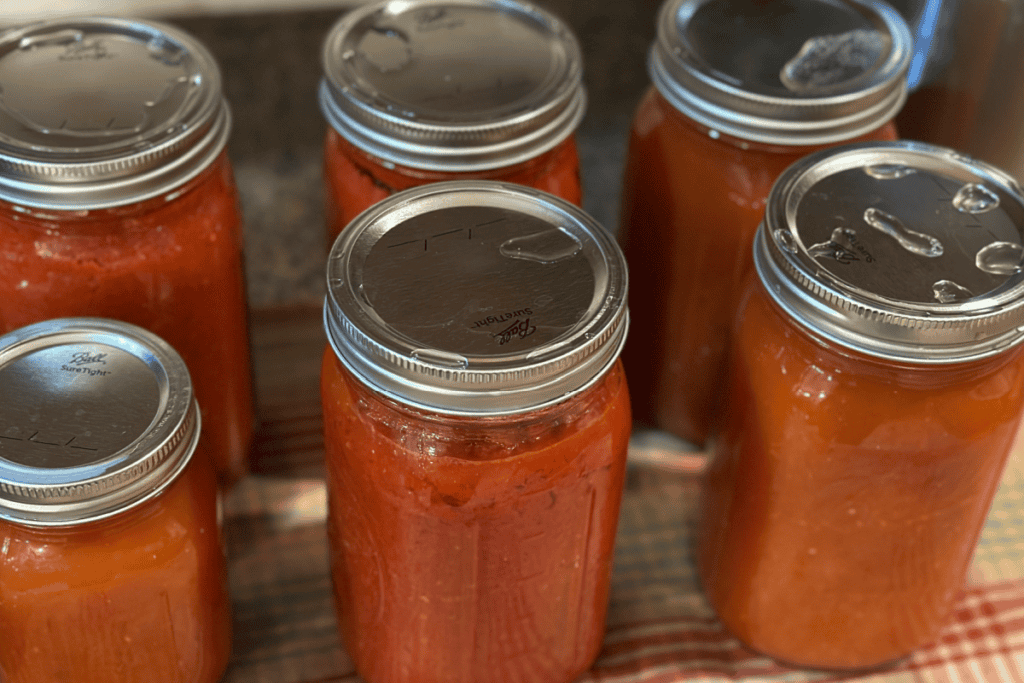
Remove jars with jar lifter after processing and letting rest for 10 minutes in the canning pot.
Place on a kitchen towel to cool, untouched, for 24 hours. Refrigerate any jars that did not seal.
Once you learn how this easy method for canning tomato sauce with skins and seeds, you’ll be glad you did.
You’ll save several steps and you’ll have a healthier, heartier sauce as a result.
Canning Tomato Sauce with Skins and Seeds
A simplified, nutritious method for canning tomato sauce.
Ingredients
- Tomatoes (Paste tomatoes such as Roma or San Marzano are best. But I use whatever kind I have in the garden- usually a mix of varieties).
- Citric acid or bottled lemon juice (if using water bath method).
Instructions
- Wash tomatoes thoroughly.
- Blanch tomatoes before freezing or before starting your sauce. Boil just for a minute, then transfer to an ice bath to retain nutrients.
- Quarter the tomatoes and add to a slow cooker, electric turkey roaster, and/or stockpot on the stove. Cover with lid.
- If using frozen/quartered tomatoes, let thaw long enough to easily dump into pot.
- On low heat, cook tomatoes down to desired consistency, removing excess liquid with a ladle as needed for a thicker sauce. If using a slow cooker(s), you can cook them all day or even overnight on low. If cooking on stovetop, the process will go much faster but you need to keep the heat on the lowest setting and stir often.
- If you have a large quantity of tomatoes or several gallons stored in the freezer, you can continue to add to your cooker(s) as the tomatoes cook down towards the beginning of the process. I usually get around 1/3 volume of sauce from my tomatoes. (6 gallons of quartered tomatoes = approximately 8 quarts of finished thick sauce. ) If you're using ALL paste tomatoes, you should yield a little more. (See notes section.)
- Once tomatoes are broken down thoroughly, turn off your cooker/ stock pot for a few minutes. Then blend with an immersion blender until smooth. This may take a few minutes.
- Turn cooker back to low heat. You can vent the lid a little or leave off if you need to thicken your sauce any further.
- While sauce is simmering after blending, prepare your canning jars.
- Use your preferred method to sterilize quart or pint jars and lids, and warm them in the canning pot for at least 15 minutes on low heat.
- If using water bath method, add 2 Tbsp bottled lemon juice to each quart jar, or 1 Tbsp lemon juice to pint jars. Or, use 1/2 tsp citric acid to quarts and 1/4 tsp to pints.
- You do not need to add acid to your jars if you are pressure canning.
- Ladle sauce into jars using a funnel. Leave 1/2-in headspace.
- Use bubble wand to release air pockets in jars.
- Add lids and rings to jars. Rings should be finger-tight.
- PRESSURE CANNING PROCESSING TIMES: Pressure cook pints or quarts for 15 minutes.
- WATER BATH PROCESSING TIMES: Process quarts for 40 minutes, pints for 35 minutes.
- Let jars sit for 10 minutes after processing is complete, before using jar lifter to remove jars to a clean towel on the counter to cool, untouched, for 24 hours. Check seals after 24 hours and refrigerate any jars that did not seal.
Notes
• Sealed jars should have an 18-month shelf life (approximate).
• There is debate about the need to add acid to canned tomatoes. But there is some evidence that tomatoes can vary greatly in acidity and it's best to add it just in case, when using the water bath method.
• Yieldwill vary greatly depending on type of tomatoes used, how much liquid is removed, how long tomatoes are cooked, etc.
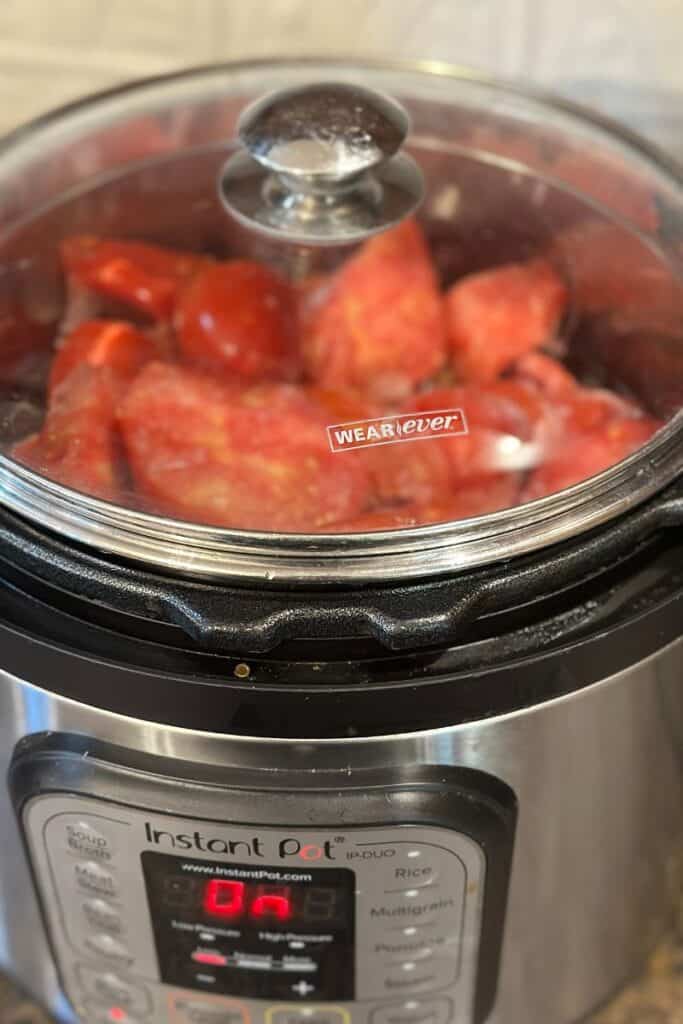
• If you need another shortcut, you can also pressure cook tomatoes in the Instant Pot rather than slow cooking them for several hours. Pressure cook for 30 minutes on normal setting with rapid release. This works great for smaller batches (or if you have more than one Instant Pot).
You might also like:
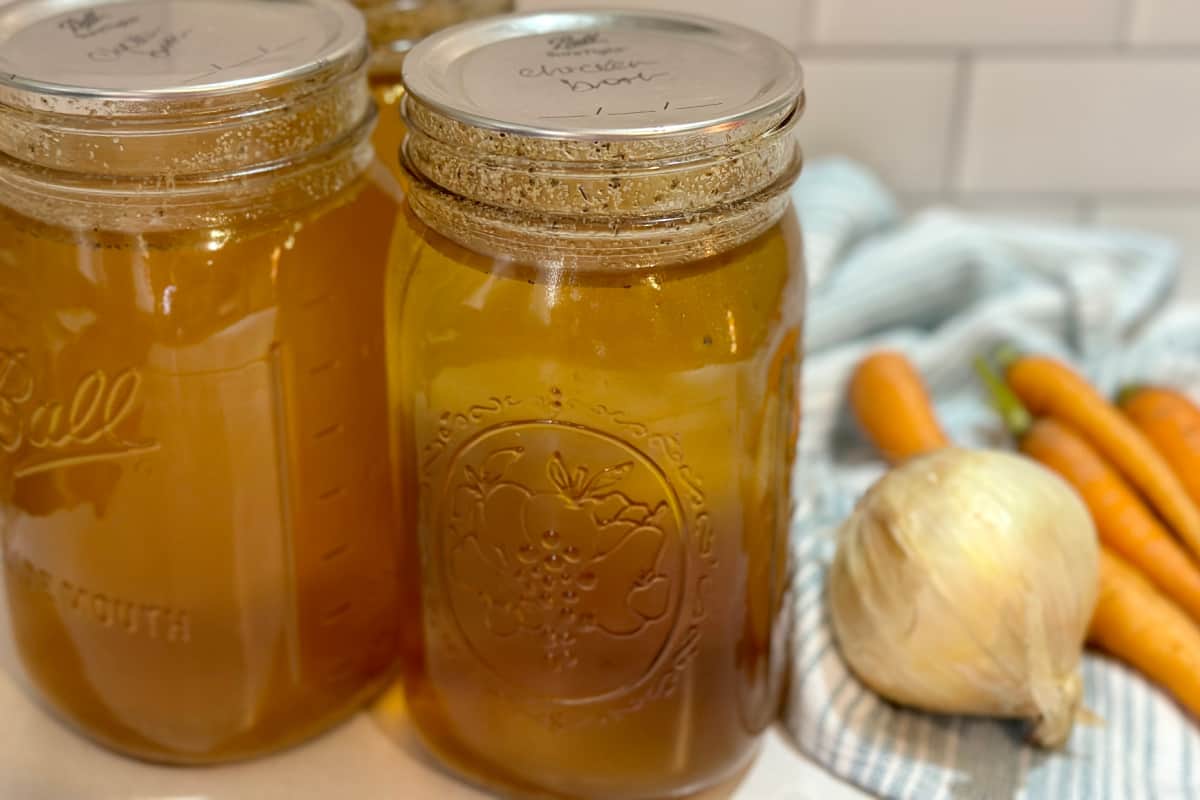
How to Can Homemade Chicken Broth (with recipe)
Methods for preserving veggies outside the fridge and freezer
Roasted Parmesan Carrots recipe


Can I add garlic cloves, salt and spices before canning? Will this mess anything up? Thank you!
No, it won’t mess anything up at all! Go for it 🙂
Thank you for this wonderful short cut! I’m freezing my garden yield as I go this summer. Lots of grandkids around, too small to help can-so I’ll freeze and wait till they all go back to school. Happy canning!
Happy canning to you too! 🙂
I usually add a teaspoon of sugar to my sauce to balance the acidic flavor.. can I still do this before canning?
Definitely! I tend to add seasonings and a little sugar as I’m making a dish later on, but I’ve also added it before canning.
I bake my tomatoes on a parchment covered cookie sheet with a little drizzle of olive oil, garlic, onion, salt and then I blend and freeze 2 cups in quart size bag. By baking it I get a little “fire roasted” effect and it tastes sooo good. But my mom has canning supplies so I’m wondering if I could do my cooking method and can it. Would the oil be a problem?
From what I have read, small amounts of olive oil is considered safe in canning (but do your own research if you’re concerned). I know people make fire roasted salsa, and it’s delicious too!
Brandi,
I used your method last year and I must say it saved a lot of precious time. I already have 18 gallon bags in the freezer of my favorite Roma tomatoes Waiting for the weather to cool. Last year I did 24 bags. The sauce was perfect, using the immersion blender is the secret when leaving the skins on. Thank you again for all of your helpful suggestions. Happy canning 🍅🍅🍅🍅
Wow, that’s a lot of tomatoes! Great job. I’m so glad you found it helpful.
HELP! I used this recipe and loved the ease of not removing seeds and skins. I only had small amount (20 Roma Tomatoes) so did not can them, but planned for use at this time. Unfortunately, my sauce before and after adding sugar, basil, oregano, salt, and garlic has a bitter taste. Any way I can improve it. Thank you in advance for any help offered.
Debra
I’ve read that herbs can become bitter pretty quickly and you want to add them at the very end. I hope that helps! Here’s an article on that topic: https://www.tastingtable.com/879881/the-best-ways-to-fix-bitter-tomato-sauce
I made this sauce and since I didn’t have enough to fill the canned I planned on doing the potatoes at the same time. Problem is the potatoes have to be pressure cooked for 35 minutes. Will that ruin the tomato sauce to can that long
Sorry I’m late seeing this, but I think the added time will probably not hurt anything. 🙂
The National Center for Home Food Preservation website states: “If a procedure from the USDA Complete Guide to Home Canning for canning tomatoes offers both boiling water and pressure canning options, all steps in the preparation (“Procedure”) are still required even if the pressure processing option is chosen. This includes acidification. The boiling water and pressure alternatives are equal processes with different time/temperature combinations calculated for these products. The pressure processing options in these products were not developed for tomatoes without added acid.”
Granted, the Center’s whole mission is basically safety in DIY, but those bit about “This includes acidification” and “equal processes” made me sit up.
These are good points. It never hurts to add the lemon juice even when pressure canning; there is a lot of conflicting advice on the acidity of tomatoes, certainly!
I use my Vitamix blender. It takes care of the seeds and skins very well. Then I let it sit overnight and the water separates out. You can ladle off the pulp and cook from there for your own consistency.
The Vitamix is a great tool!
Can you seal 3/4 filled jars
For best results (and canning safety), you want to just leave about 1/2 in headspace for this. If I have a jar that isn’t full enough, I just refrigerate it to use within the next week, or transfer it to a freezer-safe container or freezer bag and freeze it instead.
can I substitute fresh lemon juice for the bottled?
I have always understood that you should only use bottled lemon juice because the PH has been tested to a consistent level of acidity. Individual lemons can vary.
Hi, can cherry tomatoes be used. We have soooo many. Lol.
Yes! I’ve used them many times. They make a sweet sauce!
the problem with skin and seeds is the lectin content. all nightshade have this toxin. it is condensed in the skin and seeds of tomatoes.
If you’re sensitive to nightshades, you should probably omit the skins and seeds. However, what I’ve read indicates that cooking down tomatoes/ simmering for a long time (or pressure cooking) as you do when making sauce, actually reduces the lectin content significantly.