

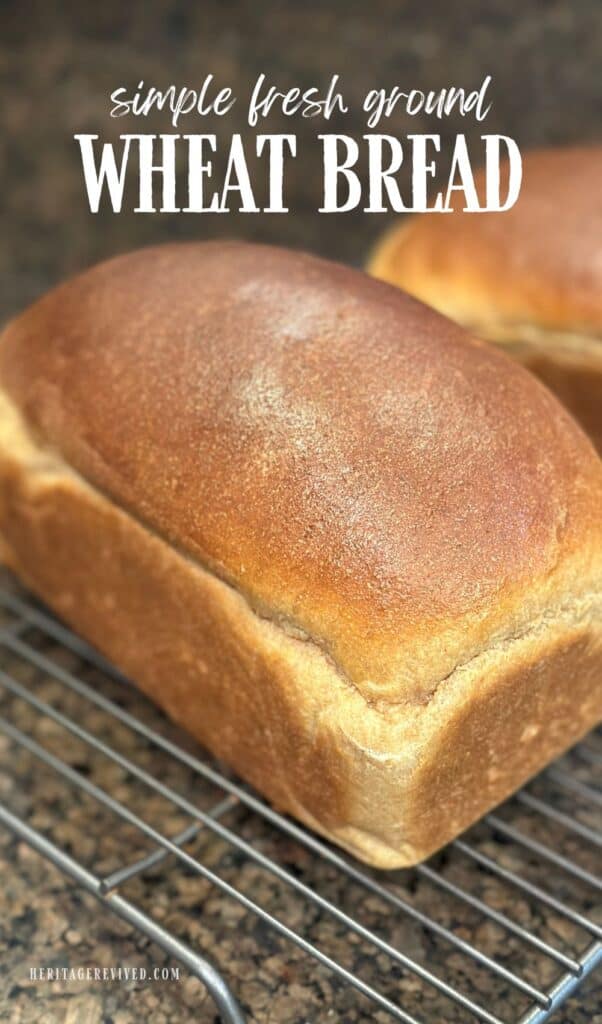
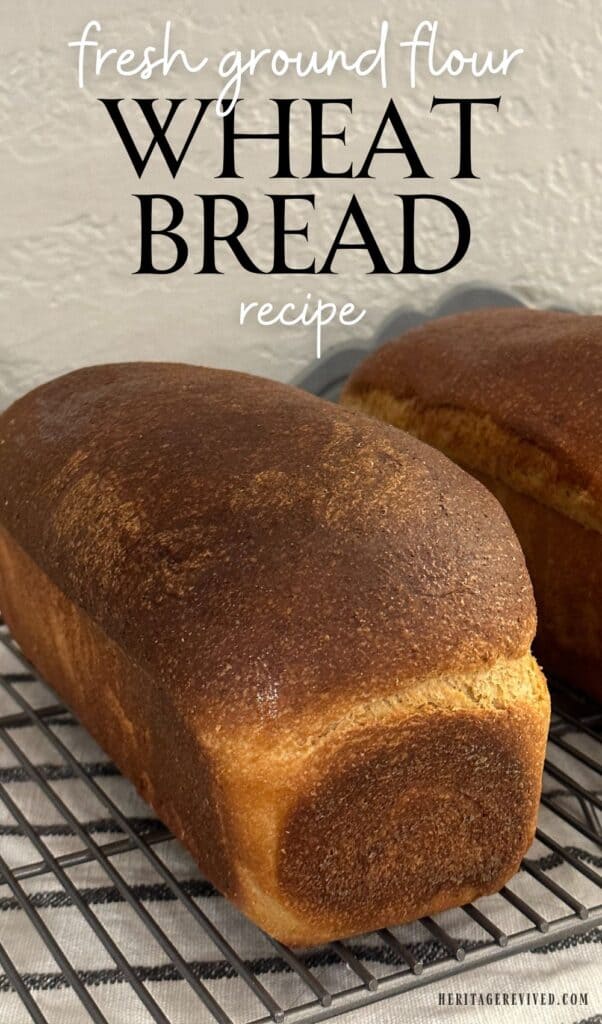
Fresh Milled Flour Bread Recipe (Perfect Sandwich Loaf!)
Be sure to read the whole post for tips, tricks and troubleshooting – for a consistent fresh milled flour bread recipe you can use every time.
If you give a gal a homestead, she will, at some point, want a grain mill to go with it.
It almost seems cliché how these two things go together.
But for most new homesteaders, it’s a big goal: learning how to mill grains and successfully use them to make whole-grain sandwich bread.
Getting that perfect, nutritious loaf takes time, persistence, and and a lot of trial and error.
Once you get into a good groove with your sandwich bread, you’ll be hooked and will want to find alll the fresh milled flour recipes. Fair warning!
Below, we’re going to go step-by-step through the process of what it takes to get a great, soft sandwich bread made with fresh milled flour.
This site contains affiliate links to products. As an Amazon associate, I earn from qualifying purchases. Please read my disclosure for more info.
Why mill your own grains, anyhow?
Making bread has been a basic, essential skill throughout history. Yet only in recent decades has it become somewhat of a lost art.
We’ve been left with what the grocery stores offer: a sorely-lacking source of sustenance.
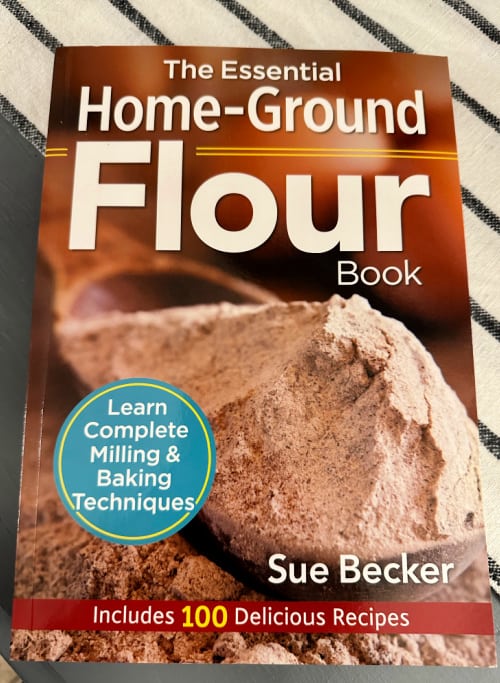
If you’ve ever dug into books such as The Essential Home Ground Flour book, you might have been blown away (as I was) concerning the complete lack of nourishment and quality of today’s store-bought flours and breads.
The main reasons I decided to start milling my own flour
- Being able to retain all the nutrients in the grain (such as wheat), which has been sifted or processed out of today’s white flour
- Reaping the benefits of the germ and bran that your body needs to function properly
- Having flour that is actually fresh (you can taste the difference)
- The ability to store wheat berries (which can last 30+ years), instead of flour, which goes rancid within months
- The cost savings (minus initial equipment) of milling your own flour on demand
- The satisfaction of learning a new skill!

Common problems when using fresh milled flour in bread
Now, I have been successfully making white bread like a pro for many years.
But I quickly discovered that working with fresh milled whole wheat is a different ballgame.
Whole wheat flour is thirsty, first of all. Actually, it’s more that is slow to absorb moisture.
So it not only needs moisture, but also ample time to hydrate.
While it’s tempting to speed up the whole wheat bread-making process, some steps just take time.
And because we’re not sifting out all the bran-and-germ goodness, it’s a heartier flour- which can mean heavy- until you learn how to work with it.
It can take time to master the techniques to make your loaves soft and light, like their store-bought counterparts. (Except honestly, way better tasting.)
It takes more yeast to rise whole wheat, and way more kneading, in my experience.
The temperature of your kitchen and counters can make a huge difference in how your bread rises (or doesn’t).
Troubleshooting tips for making fresh milled wheat bread recipe
Here are the most important things I’ve learned so far:
Not every recipe will work the same in your kitchen.
In fact, you may have to tweak every recipe a little until you get the desired results.
Humidity, temperature, elevation – a dozen factors can affect the texture and rise of your bread.
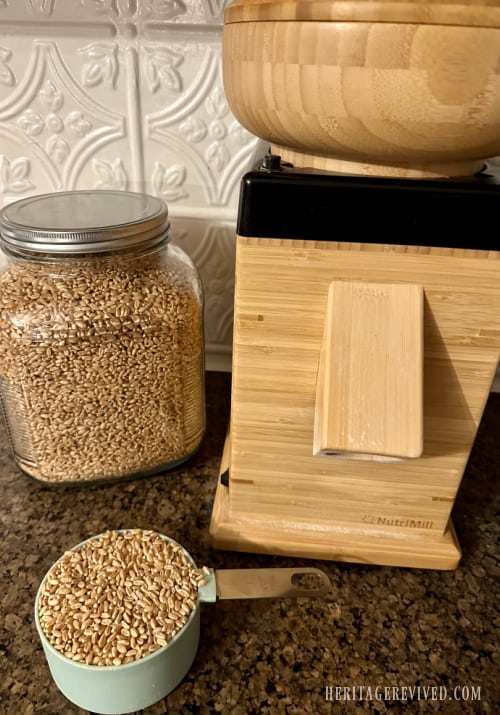
Grind your flour as fine as possible.
I use a Nutrimill Harvest, but there is a learning curve to virtually every type of grain mill.
For my mill, I have to start it, then start adding the wheat berries and immediately tighten the knob just until the stones are touching.
And then I tighten it just a little more. 🙂
You will know if you’ve tightened it too much if the flour slows down to a trickle and almost stops as it’s grinding.
At the very end when it’s done grinding, per my mill’s instructions, I back the knob off to where the stones are not touching while it finishes cleaning out the remaining bits of grain.
It’s that last step that sometimes causes problems, as I have to remember to tighten the knob every time I grind flour again.
You will definitely be reminded if you end up with coarse flour once or twice!
For my mill, I do not run the flour through to grind it a second time.
This may be a common practice with some mills, as I see it discussed in Facebook groups often.
But I have heard warnings about how it can ruin my particular mill, and I don’t see a need to risk it.
Fresh yeast really matters.
I’ve always kept my yeast in the freezer to extend its lifespan.
However, when I got to the bottom of my big jar recently, I realized it had been in the freezer for about two years.
It was time for a new batch!
I could tell the difference immediately. Note to self: Write the date on those jars before freezing.
Once you start to notice ineffectiveness- try a fresh batch of yeast before assuming your recipe is off.
Kneading time matters.
I have always had to knead my dough a little longer than the recipes I’ve tried have suggested.
In the recipe I’m sharing below, it takes about 15-17 minutes from start to finish on speed 2 in my Bosch Universal mixer, before my dough is ready for the first rise.
If it’s still sticky the last 3 minutes or so, I will add extra flour (1/4 cup at a time) and approximately an extra minute for every 1/4 cup of flour added.
Shopping for a Grain Mill or Bosch Mixer? Use Code: GETBAKING20 at Nutrimill.com for $20 off your order.
Know your environment.
The sandwich loaf recipe I had almost-success with was from Home Free Alaska on YouTube, and theirs turned out beautifully.
But when I followed their directions precisely, I was getting a dough that was too sticky and wasn’t rising consistently.
Then I realized: I do NOT live on an off-grid cabin with a wood stove as my heat source.
These things needed to be taken into account.
My house likely has higher humidity, for one. And second, after using my digital thermometer, I learned my kitchen temp was right around 68 degrees most of the time.
If I had a wood stove, my kitchen might run a little warmer in the winter.

Try a countertop heat source.
This was the BIG factor that gave me consistent, beautifully-risen loaves of whole wheat bread in the winter time.
I had tried all my old tricks for rising my white-flour loaves: letting them rise longer on the counter; letting them rise in a slightly-warm oven; using the “proof” setting on my oven. Everything.
My loaves either didn’t rise quite enough, or they were over-proofed, making them fall once in the oven.
Then I heard chatter about people using seed heating mats under their loaves. Bottom-source heat.
Hmmm. I didn’t have a seed heating mat, but my dishwasher was running and it always warmed my countertops nicely.
So I set my dough on the counter above my running dishwasher, and voila: perfectly plump loaves in record time.
If your bread doesn’t seem to be rising within a 40-minute time window, this is a great trick you can try.
When my dishwasher isn’t running, I sometimes use an electric heating pad (with a towel on top) on the lowest setting.
Type of loaf pan may not matter (as much as you think).
Some people swear by their cast iron loaf pans (I do like mine), or unglazed stoneware.
I use both, along with cheaper metal pans, and here’s my verdict:
The material doesn’t matter as much as you think.
I have experimented with all three types of pans and the other issues mentioned in this list seems to matter far more than the type of pan I use.
Glass loaf pans are the only pans I do NOT recommend using if you’re having trouble with bread rising or getting “done” in the middle. They do not heat as evenly as others.
(Fine for casseroles; bread — not so much).
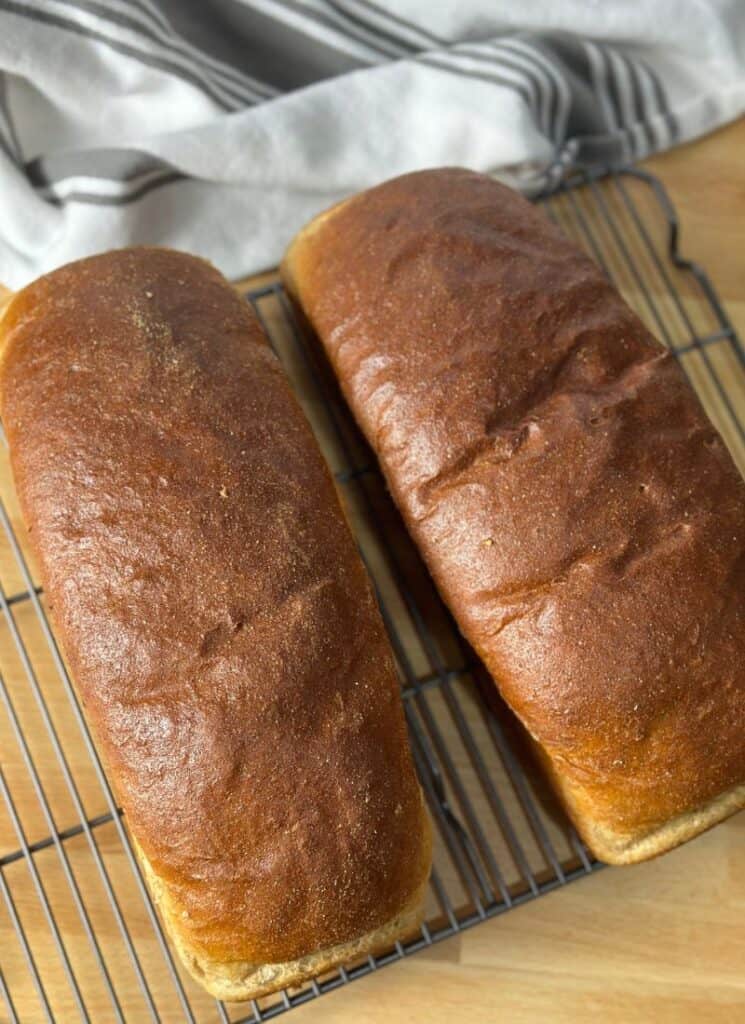
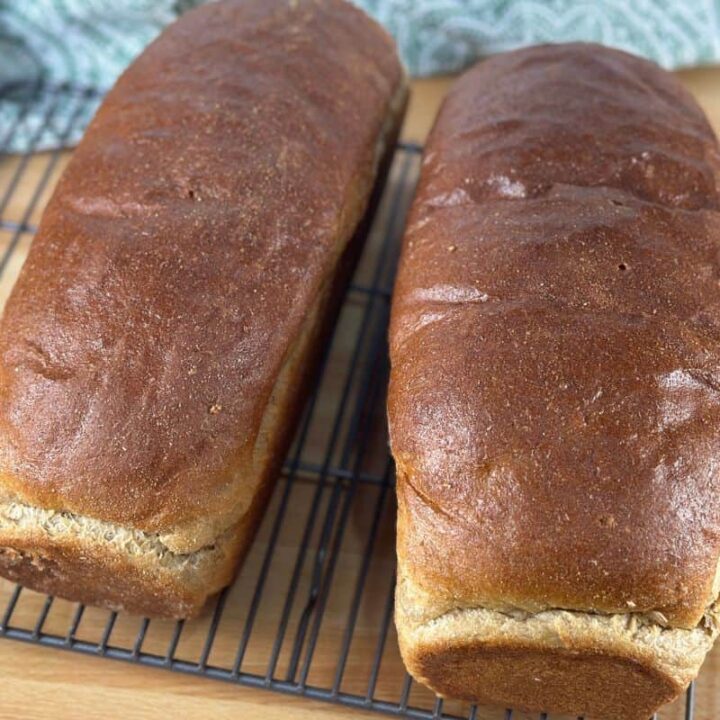
Also, for this recipe you can use either two standard loaf pans (approx 9.5 x 5 in), or two long loaf pans (13×5 inches).
The standard size pan will result in a taller loaf. I like to use the longer pans for sandwiches as they stretch a little farther for our family of six.
They also produce slices that are more consistently the same size.
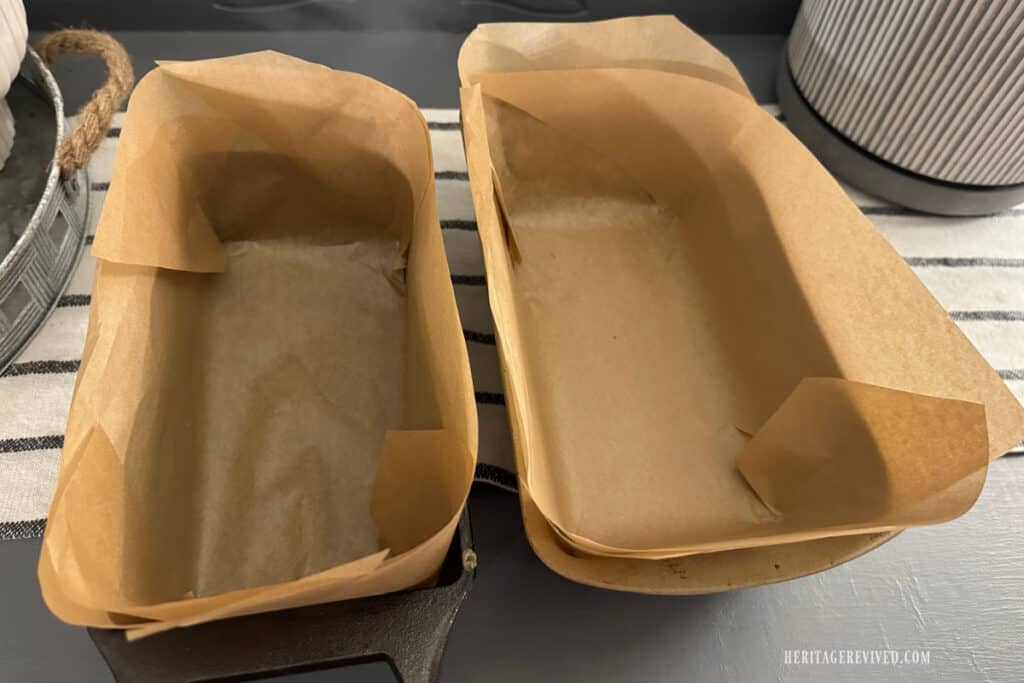
I like to line my pans with parchment paper, regardless of the pan I’m using.
If you cut a slit from each corner towards almost the center of a large sheet of parchment paper, you can make them fit quite well in the standard loaf pan, while providing higher “walls” for your rising dough.
Develop a dough-IQ.
This is going to sound a little funny, but over time, you will develop what I call a dough-IQ.
You will instinctively know what your dough should look like and feel like, before it’s ready for the first rise.
You will be able to adjust your recipe according to the weather and whatever else your dough might need that particular day.
At this point, I go more for “feel” of the dough, than even trying to reach windowpane stage.
So don’t give up! It just takes a little time, and trial and error, to learn.
Read next:
Oatmeal Spelt Chocolate Chip Cookies
Where to buy wheat berries for bread making
Light & Fluffy Waffles with Fresh Milled Flour
A Few More Notes: Fresh Milled Flour Bread Recipe
You can skip to the recipe card below if you’re a seasoned fresh-flour bread maker. These details are for those who are pretty new to making bread with fresh-milled flour.
Ingredient explanation
Most recipes I’ve found use honey as the sweetener.
A sweetener of some type is helpful to help activate the yeast. (Although, you can leave it out completely if you prefer.)
But because quality honey is a little pricey and I don’t always have it on hand, I am instead using pure cane sugar in my recipe.
(I love the organic cane sugar from Azure Standard.)
Organic extra virgin olive oil is usually what I use for the oil, also from Azure Standard.
As for yeast- I have used both active dry yeast and instant dry yeast interchangeably in this recipe; so use whichever you have. (Weird, but true.)

Eggs: many fresh milled flour bread recipes make eggs optional.
I have found that for me, at least 1 egg is needed for moisture and a better texture in my bread.
I have used either 1 or 2 eggs in this recipe with good results, but I typically like the texture better with just 1 egg so that it’s not too soft for slicing.
I’ve noticed that farm fresh eggs make the flavor of my bread better, and improve the texture even more.
You may find that you want to experiment with the extras such as vital wheat gluten or sunflower lecithin.
I’ve really strived to make this bread with as few ingredients as possible.
So I’ve only added sunflower lecithin as an optional ingredient, because it really can give the bread a wonderfully smooth texture. But it’s not 100% necessary.
I’ve also added vital wheat gluten recently as an extra, optional ingredient. It simply makes a tighter, softer loaf more like store-bought bread.
Honestly, it’s my goal to make bread that’s delicious, budget friendly, and as simple as possible. So you decide what that means for you, and feel free to experiment with these extras (or not).

FAQ’s: Fresh Milled Flour Bread Recipe
Are you sure I don’t have to proof the yeast? What about autolyse and sponge methods?
I have never needed to proof the yeast.
But I do often soak half of the flour with all the water in this recipe, for 20 minutes up to a few hours (autolyse process).
This softens the whole grains and improves the texture of the bread.
When I don’t have time, I just proceed with the recipe as written.
Another step you can try is the sponge method. After adding the yeast (step 4) and mixing for a few seconds, let the mixture rest for about 20 minutes to soak up the moisture.
You don’t need to do both the autolyse and the sponge method, but you can experiment and see which process works better for you.
Is salt necessary?
Yes. Namely because it helps strengthen the gluten, which we can’t have enough of with fresh milled flour dough!
Does the type of salt used matter?
Maybe? In the past, I thought my bread did not rise as well with pink Himalayan sea salt, though it could have been due to other factors. You do want a finely ground salt, regardless.
Do I really need to use a thermometer for bread?
Of course, you don’t have to. But with these whole grain flours, they can naturally be darker while baking and it can be more difficult to tell when they’re done.
When my loaves hit 200 degrees F, I know they are ready, regardless of how dark they look.
You can use a digital meat thermometer for this purpose.
Can I do an egg wash instead of a milk-wash?
Sure! I hate having to figure out what to do with my extra egg yolks. (Yeah, I could freeze them.)
But if you have an abundance of eggs, you can certainly use an egg white mixed with a little water to brush over your loaves, in place of milk.
Are there any shortcuts for beginners?
Yes, actually! While there is always a learning curve to be conquered, I have found that replacing as little as 1 cup of the fresh milled flour with 1 cup all-purpose (regular) flour or bread flour, can help the bread rise faster and make it easier to work with.
When I do this, I use King Arthur bread flour, which is just sifted hard red wheat (unenriched).
In step 3 below, you would just replace one of the cups of fresh milled flour with the white flour.
Fresh Milled Flour Bread Recipe
The perfect light and delicious whole wheat bread made with freshly milled hard white wheat.
Ingredients
- 4-1/2 cups hard white wheat berries
- 2-1/4 cup hot water
- 1/2 cup extra light olive oil (or any type of olive oil)
- 1/4 cup pure cane sugar
- 1 large egg (or 2 if you prefer more moisture.)
- 1-3/4 Tablespoons yeast (active dry or instant)
- 3 teaspoons salt
- 2 tablespoons of milk (for brushing on loaves)
- 1/2 Tablespoon sunflower lecithin (optional)
- 2 teaspoons Vital Wheat Gluten (optional)
Instructions
- Mill 4.5 cup of hard white wheat berries. (*See notes below on alternative autolyse method for an even softer loaf. I usually add this step unless I'm in a hurry.)
- Add the hot water, olive oil, sugar, egg, salt, sunflower lecithin (optional) and vital wheat gluten (optional) to mixing bowl of stand mixer.
- Add 3.5 cups of flour to the bowl all at once, and mix on low speed (speed 1) for about 1 minute.
- Sprinkle the yeast over the mixture.
- Slowly mix until combined, then begin adding enough flour (1/2 cup at a time), until most of the dough pulls away from the bowl. Note: Add the flour slowly! It takes a while for the flour to absorb the liquids, and it's easy to add too much flour to this recipe.
- Mix (knead) on speed 2 for about 12 minutes. If dough seems sticky after this point, add another 1/4 cup of flour at a time until dough is a soft, moist, but not gooey-sticky texture. Add another minute of mixing with every 1/4 cup of flour added.
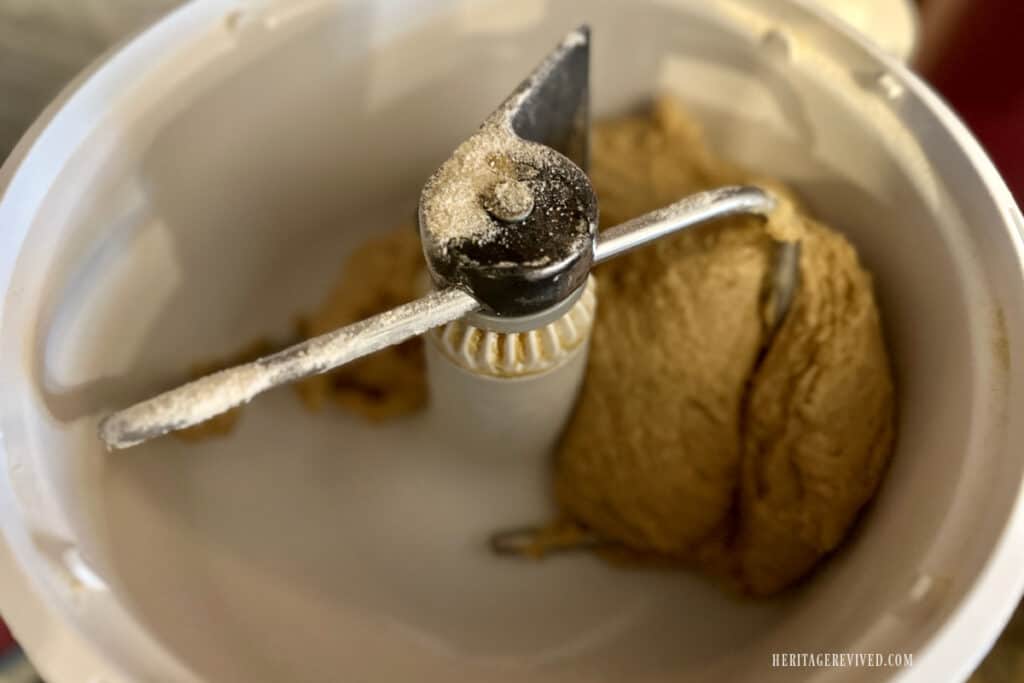
- If you did not need to add additional flour after 12 minutes, just continue mixing (kneading) for a total of 15 minutes (so, about 3 more minutes at this point). It's ok to add a few minutes to kneading time if you feel dough is not soft enough, though. You should reach the windowpane stage at this point, where you can stretch a small amount of dough and see through it, and it holds up without tearing.
- (Note: if kneading by hand, it should take nearly double the amount of kneading time above.)
- Transfer to a large bowl (at least twice the size of the dough). Cover with plastic wrap, then a kitchen towel. OR cover with two thin flour sack towels (I'm transitioning to using only these in my kitchen.)
- Set in a warm, draft free area and let rise for approximately 1 hour.
- After dough has doubled or nearly doubled, divide into two equal portions. Use a little flour to shape into loaves, and place in two greased (buttered) loaf pans (or line with parchment paper). You can use regular-sized 1-lb loaf pans for taller loaves, or the longer bread pans that hold approx. 2 lbs (13x5 in) for a larger, more standard bread loaf.
- Brush olive oil (or olive oil cooking spray) onto plastic wrap and place over both loaf pans; top with a kitchen towel. Again, instead of plastic wrap, you can use two flour sack towels.
- Return pans to your warm countertop and let rise again for approximately 1 hour, or until dough is just risen above the rim of your loaf pans. The initial higher oven temp will help finish the rising process, in most cases- keep this in mind so you don't over-proof your dough.
- Preheat oven to 400 degrees F.
- Carefully remove the towel (and plastic wrap, if using this) from loaves and place in preheated oven. Bake for 10 minutes at 400 degrees.
- Remove from oven and use a basting brush to brush each loaf with milk.
- Reduce oven temperature to 350 F and put bread right back in oven (no need to wait for temp to cool). Bake for approximately 11-13 minutes or until temperature in center of each loaf reaches 200 degrees F on a digital thermometer. (If you forget to reduce oven temp, it's ok! You'll just end up with a darker crust and your overall bake time will be reduced.)
- Transfer to a wire rack to cool. Slice with a large serrated bread knife. Enjoy!
Notes
*Alternate method: for an even softer loaf, try the autolyse method. Start by taking 3.5 cups of your freshly milled flour and mix with all the hot water in your mixing bowl. Cover bowl with plastic wrap or a kitchen towel. Let sit for anywhere from 15 minutes up to a few hours if desired. Then while mixing on speed 1, add the oil, eggs, sugar, salt, lecithin powder and vital wheat gluten (those last 2 are optional); and lastly, the yeast. Mix on low speed until combined. Then proceed with Step #5 above.
Recommended Products
As an Amazon Associate and member of other affiliate programs, I earn from qualifying purchases.


Nutrition Information:
Yield: 32 Serving Size: 1 sliceAmount Per Serving: Calories: 62Total Fat: 4gSaturated Fat: 1gTrans Fat: 0gUnsaturated Fat: 3gCholesterol: 6mgSodium: 203mgCarbohydrates: 6gFiber: 1gSugar: 2gProtein: 2g
You might also like:
Whole Wheat Dinner Roll Recipe (fresh milled)
Simple Recipes Using Stale or Flat Bread Loaves!
Crusty Dutch Oven Whole Wheat Bread
Fresh Milled Flour Waffle Recipe
Homemade Maple Syrup Granola Bars
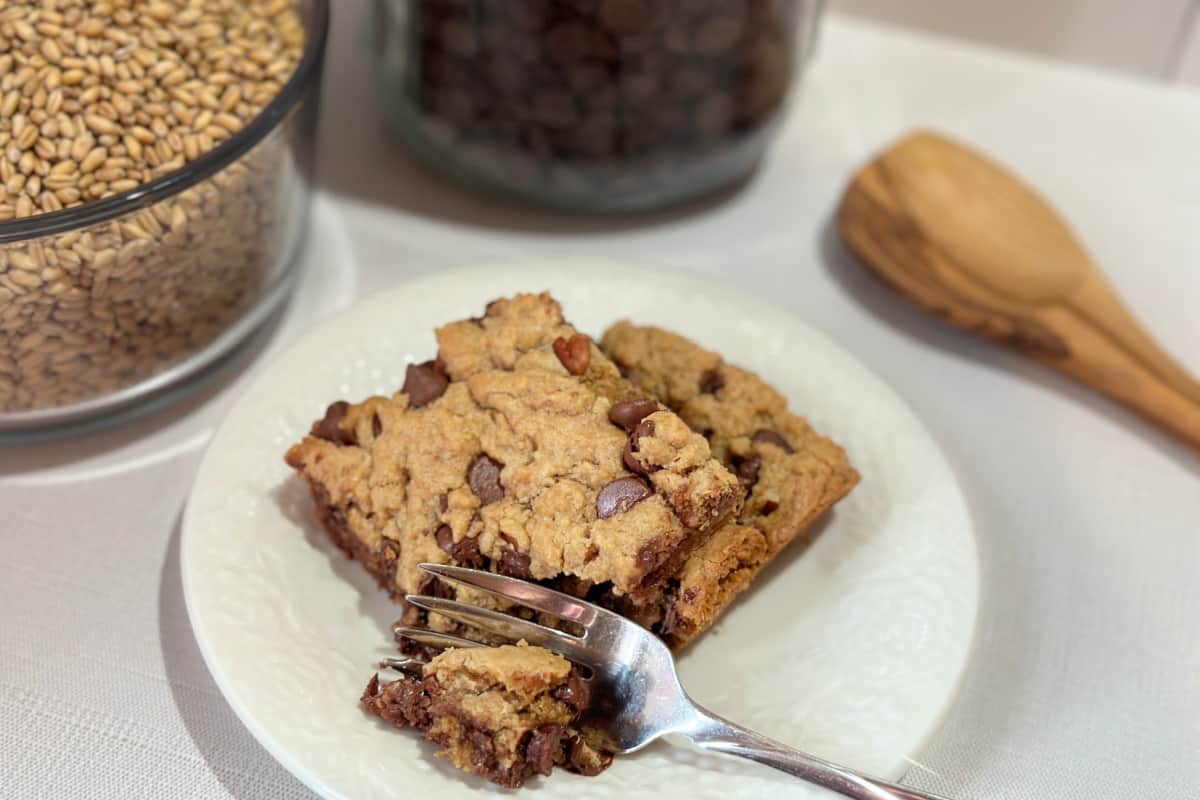
Whole Wheat Chocolate Chip Cookie Bars
Coconut Custard Pie (with Soft Wheat Flour)
Maple Cinnamon Donuts with Fresh Milled Flour


Hi. Might I use honey instead of sugar?
Hello! Yes, you can absolutely swap the sugar for honey.
Is the honey swap for sugar equal amounts 1/4 cup honey for 1/4 cup of sugar?
Yes, I use the same amount. It’s really a matter of preference!
Could you give me some guidance for making this recipe and a bread maker?
Hi there- I haven’t used a bread machine in a long time so I’m going to link this article that should help you to convert it! https://www.kingarthurbaking.com/blog/2018/04/30/how-to-convert-recipes-to-a-bread-machine
I have made this 2 times. The flavor is wonderful, the rise not so much. Should I be saving a little water back to warm up the yeast? I have been doing the 3.5 Cups milled flour and 2.25 cups hot water and letting it soak. The bread does rise but it’s about 1/2 of the loaf high.
With my kitchen being a little colder this fall, I have needed to let my dough rise a little longer. Sometimes I need 1-1/2 hours for each rise. Let us know if that helps!
Do you do any shaping of the loaves? I just put mine in the oven so I guess I’ll find out but I figured I would ask 🙂
I don’t put a lot of effort into shaping, although I have been trying to pat them into a more rectangular shape lately to get more uniform slices for sandwiches. 🙂
Wonderful recipe. I made it today with fresh-milled hard red wheat and it turned out great! Will definitely make it again. Thank you for a great recipe!
I love the flavor of hard red wheat! I’m so glad it turned out well for you.
Thank you for all the info in the post, I am new to milling. I am still trying to get this recipe to window pane but I get a little closer each time I make it.
Hi Megan! Once you get it close to windowpane, it’s easier to see how the dough should “feel” and then you may not even need to test for windowpane after that. You’ll know what it should look and feel like when it’s ready for the first rise. That’s been my experience, anyhow. Hopefully that makes sense!
I cannot say enough about this recipe! Absolutely delicious! Soft, fluffy and light as a feather, yet sturdy and doesn’t crumble. It works with hard red too and even makes hot dog and burger buns (they bake in the same time as the bread)! Here are my few tweaks:
❤️ I give the dough a 10-15 minute rest after adding the flour until it pulls away from the bowl. That way the flour has time to fully soak up the liquid and I don’t add too much flour.
❤️ I live in Texas so it takes half the rising time for me, even in winter when my house is 65 degrees!
❤️ I do an egg wash instead of milk so that the bread is always pareve.
Thank you so much for this recipe! I make it every week and sometimes twice a week!
The extra rest time is a great idea! I am so glad it turned out well for you! Thanks for stopping by and sharing your tips.
Having trouble with the final rise falling when I put it in the oven. Can you tell me why it does that and what I can do next time?
Usually this happens when the dough has over-proofed. Try reducing the rise time in the bread pan until the dough has just barely risen above the sides of the pan. The higher initial bake time should help it finish rising quickly in the oven! Let us know how it works for you. 🙂
I noticed that the top half of the bread rose, but the bottom half did not rise as much.
Hmm, I am not sure what you mean by the bottom half not rising. But if the top is caving in, it is most likely over-proofed (risen too long), and therefore the bottom will seem more dense.
lol. I think she means when looking down at the loaf, one end of the loaf is higher than the other.?
Oh! LOL. In that case, it is usually a shaping issue. I try to shape the loaves into a rectangle shape and pat the sides and ends to make it as even throughout, and square-ish at the corners. It takes some practice, and mine are not always perfect either. 😉
I’ve been looking for a decent fresh milled flour bread recipe for months. They all called for way too much liquid for my altitude and wheat berries, so no matter what I’d end up with a soupy mess. Naturally I was in 2 minds to try another recipe just to feel defeated. I tried yours, the first time it wouldn’t cook on the bottom properly, but that’s my fault on messing with the recipe and cutting out liquid, then needing to add more flour and…it was just a mess. I ended up having to knead it for 45 minutes (by hand after the failsafe cog in my mixer broke).
I decided to try it again, and although too wet to shape properly, it was the first time I’ve ever reached window pane stage AND it only took 15 minutes of kneading in my (now fixed) mixer 🥹. I dumped it in the pans and it turned out to be the best loves of bread I’ve ever had. My family were so impressed they’ve asked me to make more….2 days later and 2 loaves gone 😂
1 thing I’d suggest though is to autolyse the flour and liquid for about 15 minutes before adding the yeast to give the flour enough time to absorb the liquid before adding any more flour. I did read through the blog and I didn’t see this mentioned, but I may have skimmed over. This definitely helps at my at sea level altitude.
I’m so glad your bread turned out well! I will chime in with the sentiment that it’s usually OK if the dough is a little on the wet side, versus dry. Drier dough usually leads to heavy, dense loaves. And it’s really, really easy to add too much flour during the mixing step. So your instincts were correct to roll with it- and sounds like it worked out well 🙂 And a big YES to the autolyse step! I added that in the recipe card in the “notes” section as an alternate method, but it’s not very noticeable. I may update this recipe to include it in the main recipe instead of an optional step, because it really does make a difference. That’s what I do every time myself- 15-30 minutes autolyse. Thanks for the feedback, I’m sure this will be helpful for others having the same issues!
I’m currently making this bread recipe and *just* realise you have a bit regarding autolysing, but I definitely missed it, that’s on me haha.
I do agree with everything you’ve said, however other recipes turned out soupy wet, unlike a high hydration recipe. Anyway, can I blame you for me now having to make 7 loaves a week? Haha! No more wasted bread going stale on the counter because no one liked it! My kids beg me to make more now. Toast in the morning has now become a staple and I plan to make breadcrumbs with a loaf for a recipe.
7 loaves a week- that’s amazing! Blame me all you want- ha! I love it.
I’m so happy with this recipe and that I didn’t mess it up lol! I just bought myself a hand grain mill for Christmas and this was my very first loaf of bread with fresh milled grain! I used hard white wheat and tastes so good and it was the perfect texture! I was a little worried as I was making it because I cut the recipe in half since I had previously ground my flour a few days ago before deciding on a recipe and I didn’t have much ground. It’s a workout hand grinding I’ve found out lol. I also switched from using my standing mixer with a dough hook to hand kneading the dough halfway through because I wasn’t satisfied with my stand mixer doing the job. I was guessing by the texture of when I thought it was kneaded enough. I thought I had over kneaded it because I didn’t had a window test turning out but the dough was definitely getting harder to knead and sprung back when I poked at it so I figured I better not knead any longer in case I was heading into kneading it too much. So thankful after all the time I put into it that it was a complete success! I even said a little prayer asking for it to turn out and it has turned out beautifully! Thanks so much!
Kudos to you for hand milling and kneading yourself- that is indeed a workout! I’m happy to hear the recipe worked well for you. And, prayer never hurts 😉
Have you ever used milk instead of water?
I have not, but I know lots of people do and say that it can help to create an even softer texture. Let us know how it goes!
New to working with freshly milled flour, and it is some frustrating. Really appreciate the tips and techniques you have given us. What is the sunflower lecithin for? Gluten?
It is definitely frustrating at first, but hang in there- it’s worth it. The sunflower lecithin is an emulsifier, helping to better combine and stabilize the ingredients. It’s also high in protein which helps with elasticity, and a softer loaf of bread (rather than dense). Chicken eggs and duck eggs are high in lecithin also, and some people opt to use an extra egg in their freshly milled bread recipes rather than adding the sunflower lecithin. However, that adds more moisture to the recipe, so you may need to adjust your dry ingredients accordingly if you go that route. 🙂
Hello, is it possible to need the bread too much? I feel like I was about to the window pain stage but the dough was very wet so I added flour almost an extra cup and a half, it’s very humid and hot today but now I feel like the window pain stage is completely gone. I feel like I’ve been mixing it for an extra 10 minutes already… 😬
The humidity can definitely make it tricky to know how much flour the dough needs. It is possible to over-knead the dough, yes. Next time, I would just be sure to add the additional flour very slowly. It takes more time for fresh milled flour to absorb the liquid so it’s easy to add more flour than needed. I’ve done that so many times! Good luck.
I don’t have a mixer, and don’t have the manual dexterity to knead the dough, so I use my bread machine’s dough setting.
Can you direct me how to adapt your recipe to using my machine, please?
Hi there! I haven’t used a bread machine in a while, so I’m linking this article that I think will help! https://www.kingarthurbaking.com/blog/2018/04/30/how-to-convert-recipes-to-a-bread-machine
i haven’t used a bread machine in a very long time, but it seems to me that if you’re just using the machine to make the dough you wouldn’t need to adjust the recipe, except if your machine couldn’t handle the volume
That may be. I don’t think most standard bread machines can handle this volume of dough. There are some newer ones that do, though.
Can I use this dough to make sandwich buns?
You can, but I actually prefer this recipe: https://heritagerevived.com/whole-wheat-dinner-rolls-recipe
I just make them whatever size I need. 🙂
Awesome recipe!! It was my first time grinding my own wheat berries and I’m so thankful for a recipe that actually turned out on my first attempt!! The bread is so fluffy and soft!!
I’m glad it turned out on your first try! Enjoy!
Liquid or powder sunflower lecithin?
I use powdered: https://amzn.to/3XGFjNA
Wow! This bread turned out amazing! Thank you so much for the recipe! I omitted the sunflower lecithin and used maple syrup instead of sugar. This will definitely be my new go-to bread recipe!
I’ve been meaning to try the maple syrup swap as well. Thanks for the feedback!
Thanks for the great recipe. Made my bread so much better.
Do you have the nutritional information?
I couldn’t get the nutritional calculator to work on this recipe card, so I tried a different one online and here’s what it displayed:
Total Fat 2.6g 3%
Saturated Fat 0.4g 2%
Cholesterol 12mg 4%
Sodium 3644mg 158%
Total Carbohydrate 33.3g 12%
Dietary Fiber 4.1g 15%
Total Sugars 0.9g
Protein 7.4g
Vitamin D 1mcg 6%
Calcium 17mg 1%
Iron 3mg 15%
Potassium 217mg
*This is “per slice”, assuming 16 slices per 2-lb loaf.
This should give you a ballpark estimate. Those calculators have a hard time recognizing things like fresh milled flour and sunflower lecithin. I am almost certain it’s
higher in nutrition than what this shows.
I recently purchased 25 lbs of a whole 7-grain mix consisting of hard red wheat, hard white wheat, pearl barley, brown rice, triticale, rye, and millet. Initially, it was to be used as a cereal but I decided to try baking with it. I “mill” my grain in a Vitamix with the dry grains container and use a Kitchenaid stand mixer with the dough hook. Since there are only two of us I cut your recipe in half. Half of the yeast is a little more than one standard yeast packet. Next time I will try using a single packet. Allowed the flour to autolyze for 30 minutes. after using the full two-and-a-half cups of ground grain and kneading for 15 minutes the dough was very sticky. Should the dough all gather on the dough hook? It did rise well and with a little AP flour on the work surface and a short kneading, I could roll it into a rectangle and form a loaf. The result was a little crumbly but could still be sliced thinly enough to use for sandwiches. This is the only whole-grain recipe I have found that works well and will continue to tweak it for my grain mix.
I’m really intrigued about this grain mix! If you’re using a KitchenAid mixer, it probably will take more than 15 minutes to knead (I have another friend that I was just troubleshooting with on this.)
Well this is the closest I’ve ever come to completing all the steps in a bread recipe. I’ve tried quite a few. I got all the way to proofing them in the oven and that was a fail. They did not get as high as the edge of the pan. They look spongy. I brushed them with milk and finished baking them anyway but the last rise definitely did not work.
There could be a lot of factors such as getting the right amount of flour mixed in (too much can make it very heavy and difficult to rise); or yeast that’s a little older, or not kneading long enough. I hope it works out for you on the next try!
I was about ready to believe that using freshly milled berries just meant that my bread would always be dense…and then I found this recipe! I made the first batch with all hard white, and then again with all hard red. Taste wise, both were excellent. I over-proofed the first batch, and then noticed another commenter in Texas saying it took 1/2 the rising time. I paid more attention to the second batch and found the same to be true! It was about 40 mins for the first rise and 30 for the second. This is the perfect loaf. Thank you!
Hooray for success! I love the taste of the hard red, but I seem to have better results when I blend both hard white and hard red. I love that you are able to get a short rise time, too. Mine seems to vary a lot depending on the weather.
I tried the recipe as written. After adding the flour and mixing, it took a lot more flour (more than 3 cups) before it started pulling away from the bowl. And that BEFORE kneading. What happened?
If you do the autolyze step where you soak about 3.5 cups of flour in hot water prior to adding the rest of the flour — this really helps. When you start adding the rest of the flour, you want to do so VERY slowly. Add 1/2 cup at a time, and let it mix in speed 1 for at least a few minutes before adding more flour. Whole wheat flour is very slow to absorb moisture, so this gives it time to incorporate and will help to avoid adding too much flour. You may just have to troubleshoot for your environment, too- high humidity can mean you’ll need a little more flour at times. Did your bread turn out well? If you had a rather dense loaf, you’ll know it was probably too much flour, too fast. Let us know how it worked out!
Mine too! Just made it today. I think I ended up using about 7 cups. I added the flour slowly, but maybe it’s my mixer’s fault (very OLD Oster). But the bread came out beautiful and very tasty. This recipe is a keeper! THANK YOU!
7 cups all together sounds about right! The exact amount of flour really does vary some depending on environment, moisture, so many things! I’m very glad it turned out well for you though! I have another method for an even softer loaf using the Tangzhong method that I will have a new post about soon! Just to give everyone some options. 🙂
When you say hot water, how hot do you mean?
Honestly, I just let the hot tap water run for a minute or so and then dump it in. It really only needs to be warm – not too hot or it can kill the yeast (supposedly– I’ve never had that happen!)
I need help! I’ve made bread successfully in the past with commercial flour. Freshly milled is so much more finicky! I did the hot water mixed with the freshly milled flour and let it sit for an hour before mixing the rest of the ingredients. But it looked like cookie dough. I tried to wait before adding more flour 1/4 cup at a time like you suggested. Then I kept looking back at your pictures and your dough looked so much smoother than mine. (Like it’s suppose to). I think because I didn’t strain out the larger bits from the milling so it looks grainy! I kept adding until it cleaned the bowl but then my kitchen aid stopped from overheating! I continued to knead by hand and I think I added too much flour because it’s pretty tough and can break apart. Not exactly what I was shooting for. I’m letting it rest now and hoping it will turn out somehow. Do you think it was because I overmixed it, added too much flour or didn’t mill the grain fine enough? I have a mock I’ll and had it on #1 setting. Do I need to make the stones closer for a finer mill? What do you suggest I do to make it soft and pillowy like yours? I’m gonna try again for sure. If you respond before I try again, it can be helpful while I make it. I know you’re not waiting around for messages, but it would be great help as we are trying to bake more with whole grains and milling all our grains and corn. Thanks for any help you can give me. Oh, one more thing, I did use 2 eggs instead of 1 because I wanted more moisture in my bread. I appreciate your site, thank you so much! Have a great day! Val
Hi Val! Those are great questions and it’s hard to say for sure — but it sounds like a combination of not getting the grain milled finely enough, like you mentioned, and most likely adding too much flour. That’s what we all tend to do when starting out with fresh milled flour. You want to add it very slowly. Do about 1/2 cup at a time, let it mix a few minutes, then keep going until it cleans the bowl- then move on to the kneading. I had the same trouble with my KitchenAid mixer overheating, and later got the Bosch mixer to handle the heavy dough better. I know some people with the KitchenAid will mix or knead for a few minutes, then let it cool off, and go back and forth until it’s fully kneaded. That might keep it from overheating.
As for milling the grains- yes, you need the stones touching as close as possible while still allowing the grain to pass through. I don’t have a Mockmill but I would say that if you can adjust it to a little finer setting, then try that. With my Nutrimill Harvest, I first turn the mill on, then crank it to where the stones are touching briefly, then back it off until they’re not touching but very close; then add the grains, tighten knob quickly and adjust it until I get a steady stream of flour with the stones as close as possible. You shouldn’t need to strain out any large grains if you adjust it quickly right after adding the grains.
I don’t think the 2 eggs is a problem, I’ve made it with either 1 or 2.
There is definitely a learning curve, but keep working on it– you’ll get a good feel for what the dough should look and feel like soon!
Please let us know how it works out the next time. Thanks for stopping by!
Everything was going so well and then when I pulled it from the oven it sunk. What did I do wrong?
I am guessing it probably rose too much on the 2nd rise. You might try to be sure and just let the dough rise in the pans until it’s barely rounding out and above the rim. It will finish rising pretty quickly with the 400 degree oven. Good luck!
Can this recipe be halved for 1 loaf?
Ty
Deb
Yes, it should work just fine!
I’ve been looking for a FMF bread recipe that was not over involved and turned out great. Used this recipe today and am SO impressed! I did as the notes suggested and let the water and part of the flour rest a bit before mixing the rest. I also swapped dry yeast for my sourdough starter which meant I needed to add a little more flour than the recipe called for to compensate. I also needed to let it rise longer. But it worked fabulously! The bread is soft but not crumbly and tastes great. Thanks for sharing this recipe!
I’m so glad it worked well with the sourdough starter- that’s excellent!
I did not measure my berries. how many cups of flour do I need?
You’ll want to mill about 7 cups of flour and then just follow the recipe and add it in slowly (you probably won’t need all of it).
I just got the Nutrimill Harvest and just made this recipe without the sunflower lecithin. it rose well but is so crumbly that the baked loaves are falling apart. Any suggestions?
Hi there! Three common things I can think of that could be happening is not kneading long enough to develop the elasticity of the dough; not grinding the grain fine enough (I try to get it really fine by cranking it to where the stones are just touching), and/or possibly baking it a touch too long. Also, you might make sure to run some rice through your grain mill to deglaze the stones and see if that helps!
I just want to say that this is the FIRST recipe that has ever turned out good fresh milled flour bread!! I have had so many squished, wet undercooked loaves that my family doesn’t trust my fresh milled loaves. This will change my reputation! Thank you so much!!!
Best comment ever, lol! I totally understand what you mean by winning your family over – it took me quite a while to produce edible loaves too. Glad to hear your reputation is salvaged. 🙂
I switched from Kamut to winter wheat and experienced frustration that my loaves were not up to my standards ( flat ). I used your recipe ( mostly ) and my bread went from a 1 to a 10. I used maple syrup ( real ) instead of honey and put all my ingredients in the mixing bowl at once. I used freshly milled grain. I came out tall and light. Thanks so much for there help transitions from kamut to hard winter wheat.
Three cheers for light and fluffy loaves!
Not sure this is the right place to ask- it I bought what I thought was ground wheat flour…… when i home it only said Wheat. IT IS GROUND UP BUT NOT AS FINE AS MY REGULAR FLOUR Is. How can i use this.? Not sure what to do.appreciate any input. I don’t have a mill to grind it up finer.
Great question. In general, wheat flour from the store is going to look a lot coarser than any white flour. But even then, it’s almost always sifted to a certain percentage (they don’t usually note this on the label). So I would use it just like you would fresh milled flour! Using the autolyze step in this recipe where you soak the flour and water (15-30 minutes) can also help to soften coarse wheat and give your bread a softer texture. Hope that helps!
I have been making fresh milled since April of 2025. I had talked about doing it for years, having had a Bosch mixer and making bread for over 35 years. WOW! I wish had started so much sooner with fresh milled.
I started using this recipe pretty quickly in my journey. I have tweaked it a bit to my liking but it is honestly the BEST bread. We no longer buy bread or buns. I have never looked back. My husband takes sandwiches to work for his lunch and he takes it all the time. He calls it BUNNY BREAD which is a popular brand where we live. Thank you for sharing your recipe. I had about 6 ladies in my kitchen a few weeks ago to demonstrate fresh mill and bread baking. They became interested. I love it, esp. since 4 of them were young moms.!!
I’m so glad the recipe was helpful for you! Great job on passing on these skills to the next generation. I also wished I had learned fresh milled baking sooner. But there’s no time like the present, right? 😉
If using active yeast, do you proof it first and cut on the liquid?
It is recommended to proof it for best results. I’ve done it both ways and have not noticed a big difference- proofing or not.
How would the baking time work with a gas oven?
Thank you for the recipe! I’m excited!
Hi there! I’ve never had a gas oven, but from what I’ve read, the baking time should be the same.