Beginner Tips for Starting Seeds Indoors (Read BEFORE you start!)
Starting seeds indoors for the first time? Here are the basics you should know: step by step.
Ah, Spring. Just when the monotony of a gray winter sky threatens to drag us down, there comes a sunny, spring-like day. Then another.
Before you know it, the growing season will be in full-swing, and the long dormant period, a distant memory.
But while we anticipate all things budding and teeming with life in the garden, there’s some work to be done indoors.

Of course, you can grow direct-sown plants only, if you’d rather. (These are a few that do well in general.) Or you can even buy seedlings from your local plant nursery or big-box store.
However, in this guide I’m speaking to those of you who want to save money on seedlings by starting your own.
In most climates, there are plants that need a head-start on the season in order to actually produce or mature during the season, and those are the ones that take a bit of a learning curve to get them from seed to “ready to plant” stage.
In this post, we’ll cover the basics you’ll want to know for starting those seeds, and giving those seedlings the best chance to grow and thrive thereafter.
Get Organized & Have a Plan
Before you start seeds, it’s really best to have an overall plan for your garden.
What will you grow, and how much space does each plant require? A rough drawing of your garden space with actual dimensions and rows can give you better direction.
When deciding what to plant, you must know your growing zone. This will coordinate with what plants will do best in your area, according to the seed specifications on the package.
Not every type of plant will grow in every climate. If you live in the desert and try to plant cool-weather, moisture-loving plants, you’ll be in for a rude awakening.
Once you know how much space you have and what you want to plant, you can get a better idea of how many plants you hope to start for each type of vegetable, or flower.

Sure, some seeds are cheap and it may not seem like a big deal to just start planting everything indoors and “see what happens”. (And it’s not the end of the world if that’s your approach.)
BUT, new gardeners beware! What starts out with a few innocent seed-starting trays can quickly multiply into hundreds of plants that require light, a lot of space, and precious time to care for.
You want to start enough seeds so that if some fail, you’ll have backups. But not so many that the seedlings take over your house like an overgrown indoor jungle.
Once those seedlings begin to thrive, it’s really hard to just throw out the excess plants if you end up with waaaay more than your garden can hold (and your neighbors’, for that matter).
If you need a boost getting organized before starting your seeds, our Everything Garden Planner can help.
Read Next: Do these 10 garden chores in winter- here’s why
Timing is Key
Once you know what you’re going to plant, approximately how many plants, and where, it’s time to get to know your climate versus what your seeds need.
Know your last frost date (for spring planting)
You’ll start with your average last frost date. In my zone (6b), the last frost date this year is approximately April 22nd.
This means that unless I’m planting seeds that can “tolerate frost”, I need to wait to put my plants into the ground until sometime after that date.
Again, last frost date is an estimate. As you get closer to that date, you can look ahead on your local forecast and see if there are any expected temperature dips around that timeframe.
You also have to consider that even if the last frost date is passed, the ground may not be warm enough for hot-weather loving plants such as peppers, until even a week or two after that time.
This will all depend on temperatures on any given year, but just know that soil needs time to warm up in order for summer veggies to thrive.
How to know when to start seeds indoors
As far as when to start those seeds, you will count back from the average last frost date– OR, the date you’re planning to plant your seedlings outside.
Your seed packets should give you this information, or a quick internet search for each particular seed.
For instance, when I’m starting Roma tomato seeds, the instructions say to start seeds indoors approximately 6-10 weeks before my last frost date.
To be on the safe side, I usually start some of my seeds closer to the far end of that range: 10 weeks or so. And then I start more of the same seeds a few weeks later.

This way, if the some of the first batch fails to germinate, I still have time for the second batch to get started before planting time.
(And hopefully, I’ve figured out why they didn’t germinate so I can make adjustments the 2nd time around.)
While many, many seeds will fall into the “6-10 weeks to transplant” range, some seeds need much longer to grow before planting outside. And some need to be planted outside earlier than others.
For instance, in my zone, broccoli seeds need to be started at least a few weeks before tomatoes and peppers, in order to get them into the ground during the cool-weather period that they grow best in- which is before the last frost date.
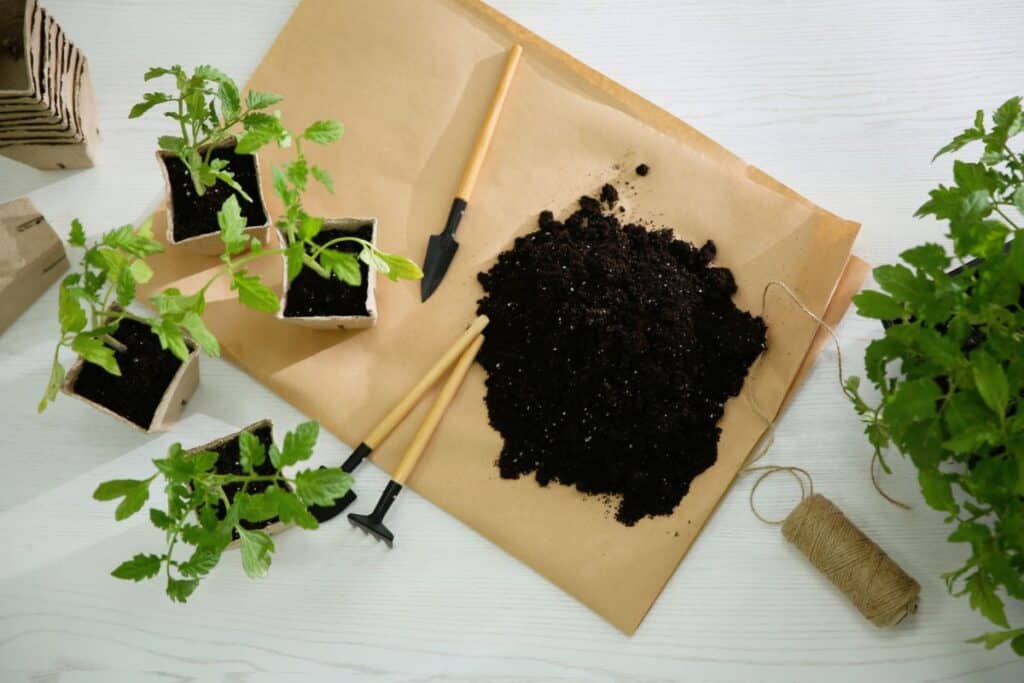
Choose the right soil medium
If you search online for the best soil mixture or medium for starting seeds, you’ll get about one zillion answers. Truly, there are a lot of options.
What I’ve found that works best for me is a combination of :
- Basic potting soil
- A little perlite
- A little compost.
A small amount of worm castings can also go a long way when added to your seed starting mix, although it can be a little pricey. (Hence, the reason I use it sparingly.)
I do tend to add more worm castings as a top dressing when I pot seedlings into bigger pots, however.
Perlite helps to retain moisture, and the potting soil and compost feed your growing plant and provide structure.
Disinfecting soil
My great-grandma always baked her soil in the oven to kill weed seeds and potential unseen bugs.
If you buy commercial bagged potting soil for starting seeds, it’s important to heat-treat the soil. I learned this the hard way one year when I ended up with a fungus gnat infestation.
Fungus gnats not only fill your home with the the tiny, irksome pests, but the larvae can eat on the roots of young seedlings and damage or even kill them.
By pouring some boiling water over your soil before using it for planting, you can kill any eggs that could wreak havoc on your seedlings.
Simply dump the soil in a wheelbarrow or bucket, and pour over a generous amount of boiling water; let it dry outside in the sun (it doesn’t take long to dry).
Caution with homemade compost
Making your own compost is a wonderful idea, but there’s a few things to know before using it in a seed starting mix (or in your garden).
It’s important make sure it has heated sufficiently to kill off seeds from old plants, and any unwanted bugs such as pill bugs and sow bugs.
Having a lot of bugs in your compost can mean it’s not decomposting fast enough, likely because it’s not not enough.
Some bugs can feast on young plants, so you want to be careful to not use compost that isn’t completely decomposed in your seed starting mix.
If your compost pile hasn’t reached a certain temperature, you may also have the problem of last year’s garden plants growing in your compost.
This can make it tricky to identify what’s actually growing in your seed trays: the new plants or old ones! (Ask me how I know.)
Read more on common composting problems here. Or, consider just using finished, store-bought compost as you learn more about making compost over time.
Right before planting seeds
A good tip I’ve learned is to be sure to moisten your soil in the seed starting trays with some water the day before you plan to plant your seeds.
This allows the soil to settle and compact, and you will know if you need to add more soil before planting them (to avoid having soil and seeds sink down too far into the container).
Seed planting tips
When you’re ready to plant your seeds, place 2-3 seeds centered in each cell. This gives you a good chance of at least one seed germinating.
More often (with quality, fresh seeds)- MOST seeds will germinate and then you have to decide as the plants sprout which ones to keep and which ones to discard.
The other option is to gently separate them and replant the extras into their own containers. You want to wait until they’ve grown their second set of “true leaves” before doing this.
Choosing sufficient lighting
One really important step to growing strong seedlings is making sure they have plenty of light.
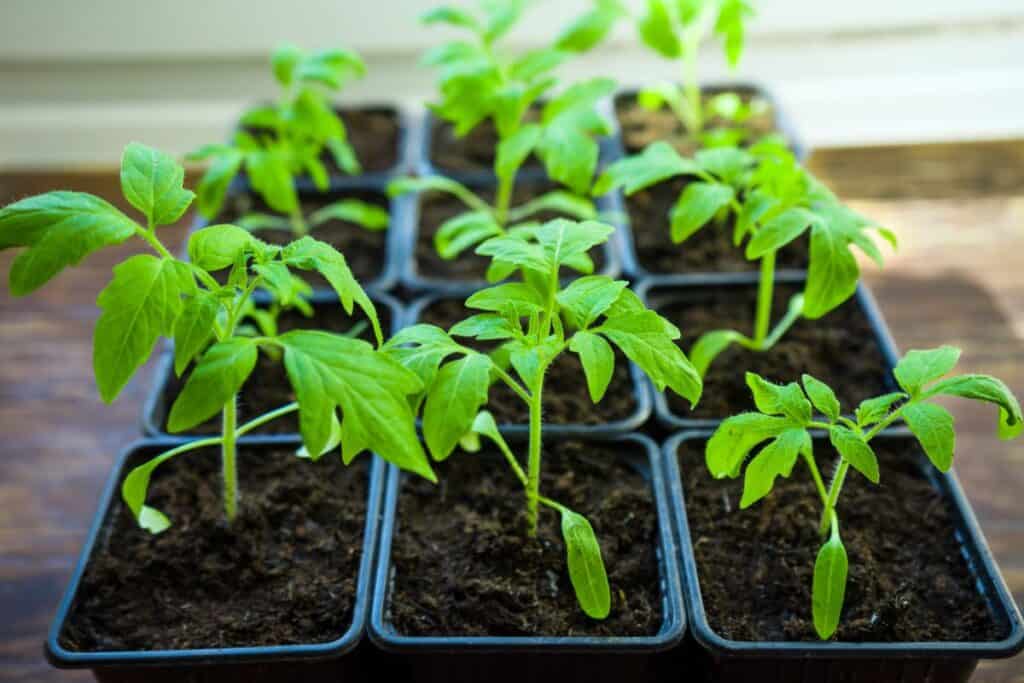
The truth is: it’s typically hard to grow hardy seedlings with natural light from the window, although if you have many south-facing windows, it is possible.
What typically happens though, is that your plants will stretch to reach the far-off light source and become weak and “leggy” from growing too fast. Then they topple over or break off when you try to re-pot them later on.
Investing in some LED lights or basic shop lights that you hang just a few inches above your seed trays can help your seedlings grow at a slow, steady pace.
You don’t need a fancy setup, just some bright, full-spectrum lights placed directly over your seed trays.
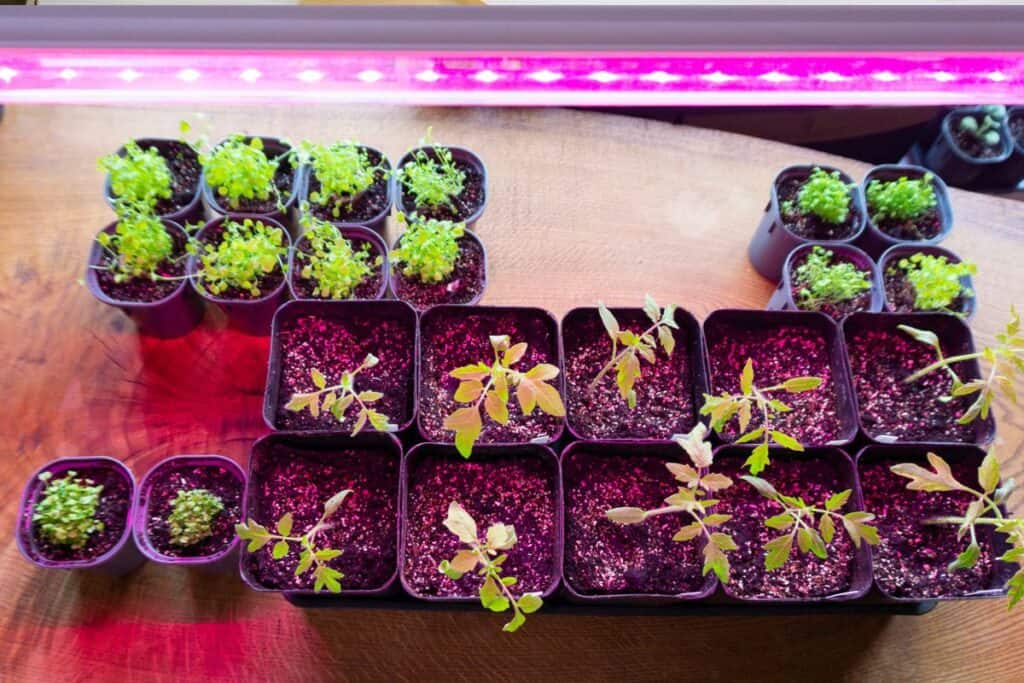
You want to keep them just a few inches above your plants, and slowly raise the lights as the plants grow (or slowly lower your plant trays if you’ve propped them up closer to the light).
I have two sets of these lights that I’ve used for several years now. Each light bar is separate and they can be daisy-chained together, making it easy to move them around to different shelving units as needed.
Currently, I’m using 4 light bars per shelf, which covers 2 flats of seed trays. I prop my seed trays up by using larger seedling containers flipped over, underneath them.
Monitoring moisture
The best way to water seedlings is just to spritz them with a spray bottle until they are around an inch tall. At this point, they should have sufficient roots to be watered from the tray underneath.
Watering bigger seedlings from the tray — that is, adding about 1/2 inch of water into the tray and letting the seedlings soak up the water slowly — is helpful for several reasons.
First, it can prevent gnats, as the soil is not constantly wet on top. It also can prevent mold and fungus from forming and causing “damping off“, where plants can become infected and die.
How often you water depends on humidity and heat in the room your seedlings are in, as well as how deep or shallow your seedling cells are.
In early spring when starting seedlings in my mud room, I run a small space heater on low and usually need to spritz my seedlings twice a day to keep the soil from drying out.
You can simply test the soil with your finger and see if it feels moist when you press on it.

Best temperature for seed starting?
Much like advice on potting mediums, there are many opinions on what temperature is best to sprout seeds.
I have found that heating mats can speed along the process of germination, especially in those hot-weather loving pepper plants. But they’re really optional.
If you start your seeds early enough, your seeds should germinate in a comfortable indoor environment. As I mentioned, I run a little space heater in my mud room, but that’s only because that room is several degrees cooler than the rest of our house.
Air circulation
You can use a fan on your seed trays at any time during the process. Running a fan part of the day allows air to circulate and can prevent mold from forming on the soil.
As seedlings become a few inches tall and are starting to develop a thicker stem, the air from a fan also helps to strengthen plant’s roots as they learn to resist the elements. When they are eventually transplanted outside, they will be more likely to thrive as they have already been exposed.
Of course, you’ll want to “harden off” your plants in the week or so before planting them outdoors. This involves letting them sit outside in a sheltered spot where they can slowly get exposure to wind and sun, increasing the time a little each day before planting.
When to pot up seedlings
Most seedlings need a new container once they are twice the height of the current container.
Other signs, such as roots circling the container or poking through the bottom, can be a sure sign that a seedling has outgrown its home.
Most seedings, even if planted in a large pot to begin with- will benefit from “potting up” to a different pot.
This process helps to strengthen the plant’s roots as it has to adjust to its new environment.
Tips for Starting Seeds Indoors: Learn as you go!
Before you start to get overwhelmed with all the advice for how to start seedlings for your vegetable garden…don’t!
Simply take these steps as a jumping off point, and then dive in. You’ll make some mistakes along the way.
It took me a few seasons to learn about what my seeds needed and how I could make adjustments the next time around.
I took lots of notes in my Garden journal which helped me to remember what worked- and what didn’t, the following year.
Observation, time, and trial and error can be excellent teachers- in life, but especially in gardening.
Read next:
Common beginner gardening mistakes to avoid
Our favorite plants to grow in our zone 7 garden
How to fill raised garden beds (cheaply)
Where to buy the best garden seeds online
Preventing garden weeds (and controlling them)- without chemicals
Winter garden tasks to get ahead of before planting season